
Facebook ReAgent - An End-to-End Use Case

Facebook decided to release their end-to-end applied reinforcement learning platform called ReAgent, after reading their vision on this, I have to say that I am completely hooked! They are providing an excellent view of Reinforcement Learning and the future adoption of it. But why is this and how can we get started with it?
From working with enterprise customers for the past 2 years, my experience is the following in the Reinforcement Learning domain:
- The customer maturity level is low - they do not know what Reinforcement Learning is, nor do they know how to get started with it
- To quote one of my customers: "Ah it's that tool used for playing games"
- It's hard to implement in current existing systems, they are mostly based on hard coded rules (or even heuristics if they're modern) making it a technical debt investment
- Modeling the existing problem into a Markov Decision Process (MDP) is not always trivial
- Existing systems use a variety of languages: Python, C++, PHP, C#, … how do you integrate into these applications?
- Personal: I think the performance impact caused by Python should not be overlooked - I for example saw a 44x increase on a personal benchmark I did when comparing C# to Python for an Expected SARSA algorithm.
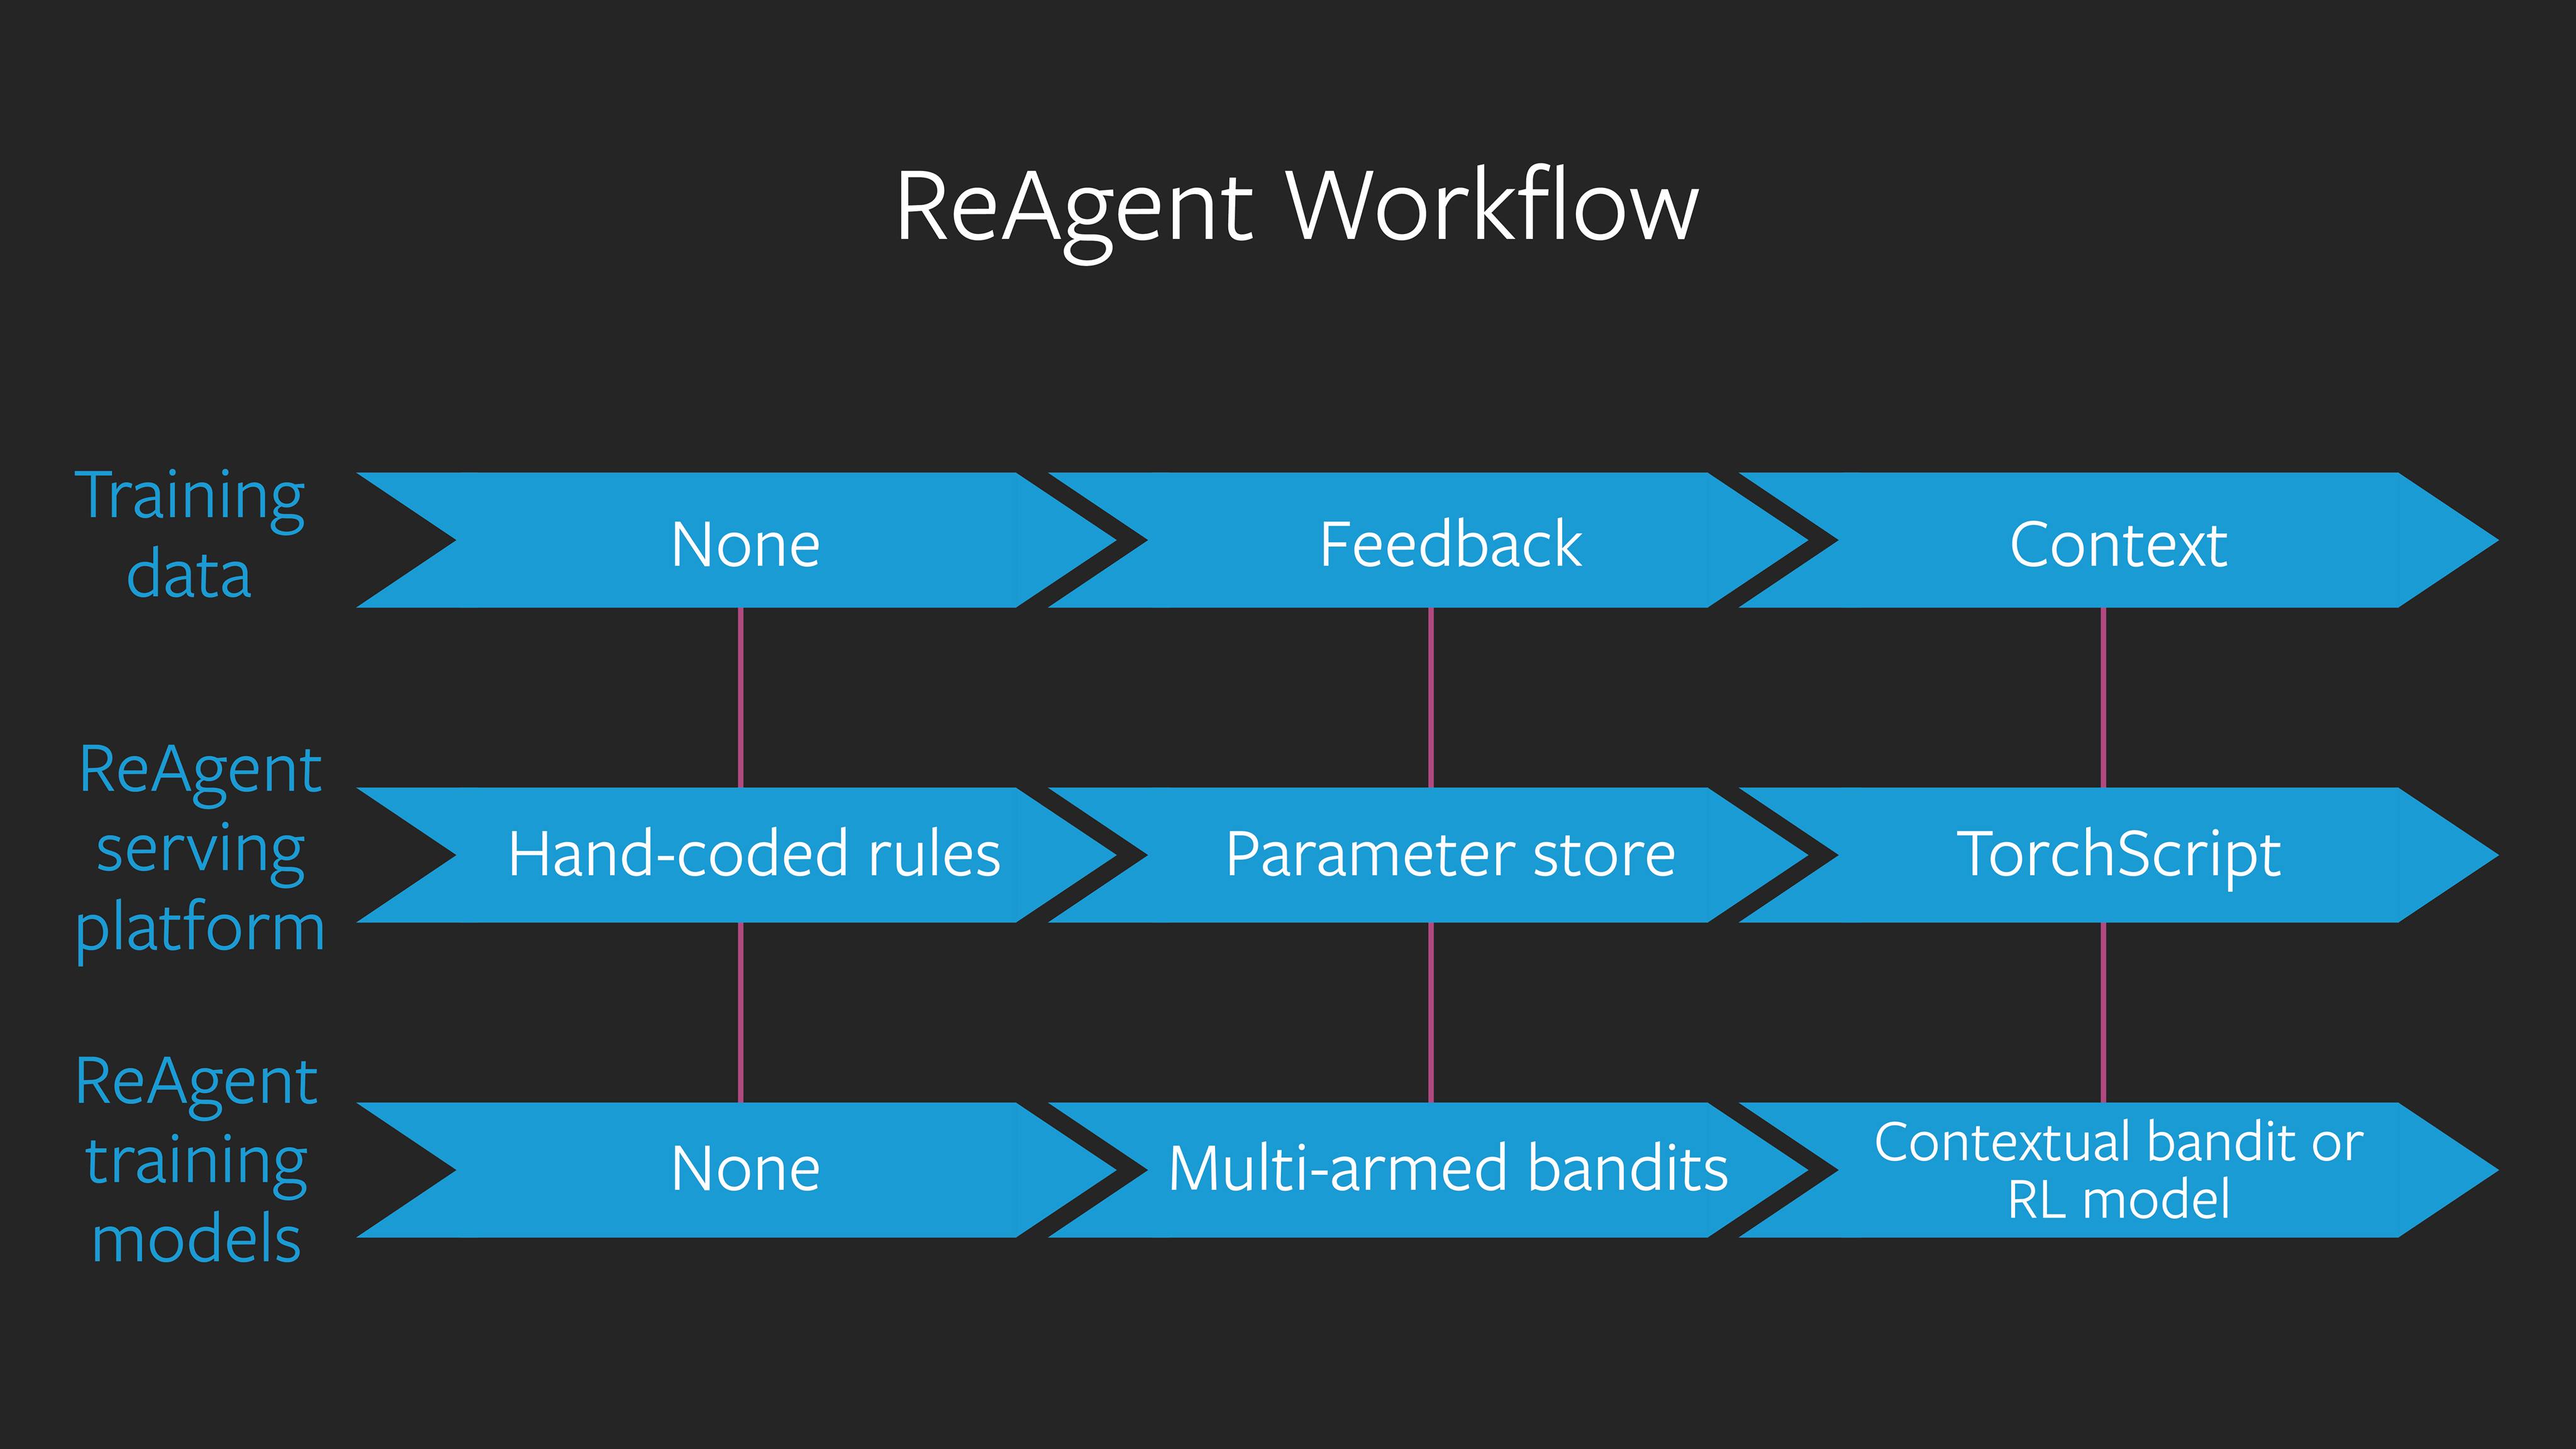
Which is why I think the ReAgent platform proposal shines! It does solve all the problems mentioned above since it now allows the customer to gradually adapt due to the workflow provided, going from hard-coded rules to eventually Torchscript running the Bandit or RL Models. Illustrated as follows:
To get started with this I installed and ran the getting started guide myself.
Installing ReAgent
Luckily Getting Started with ReAgent has been made easy due to the excellent tutorial that is being provided by Facebook. Installing the platform can be done by executing the following:
# Install extra dependencies
sudo apt-get update
sudo apt-get install build-essential ca-certificates cmake git sudo software-properties-common vim emacs wget
sudo apt-get install unzip
sudo apt-get install libboost-dev # Boost C++ Lib - https://www.boost.org/
sudo apt-get install libgflags-dev # Commandline flags processing - https://github.com/gflags/gflags
sudo apt-get install libgoogle-glog-dev # Application level logging - https://github.com/google/glog
sudo update-ca-certificates

# Install Miniconda
wget https://repo.anaconda.com/miniconda/Miniconda3-latest-Linux-x86_64.sh -O miniconda.sh
chmod +x miniconda.sh
./miniconda.sh -b # silent install
export PATH="${HOME}/miniconda3/bin:${PATH}" # Enable conda for now, conda init will completely init it in bashrc
#echo 'export PATH="${HOME}/miniconda3/bin:${PATH}"' >> ~/.bashrc
conda config --set auto_activate_base true
conda init
source ~/.bashrc

# Install Spark
wget https://archive.apache.org/dist/spark/spark-2.3.3/spark-2.3.3-bin-hadoop2.7.tgz
tar -xzf spark-2.3.3-bin-hadoop2.7.tgz
sudo mv spark-2.3.3-bin-hadoop2.7 /usr/local/spark
export PATH=$PATH:/usr/local/spark/bin
pip install "gym[classic_control,box2d,atari]"

# Install LibTorch
# see: https://pytorch.org/get-started/locally/
wget https://download.pytorch.org/libtorch/cpu/libtorch-cxx11-abi-shared-with-deps-1.3.0%2Bcpu.zip -O libtorch.zip
unzip libtorch.zip -d $HOME/

# Set JAVA_HOME
export JAVA_HOME="$(dirname $(dirname -- which conda))"
export CONDA_PATH="${HOME}/miniconda"
export LD_LIBRARY_PATH="${CONDA_PATH}/lib:${LD_LIBRARY_PATH}"

# Install ReAgent
conda config --add channels conda-forge
conda config --add channels pytorch
#conda install glog

git clone --recurse-submodules https://github.com/facebookresearch/ReAgent.git

# Install ReAgent
cd ReAgent

conda install --file requirements.txt

mkdir serving/build
cd serving/build
cmake -DCMAKE_PREFIX_PATH=$HOME/libtorch ..
make -j$(nproc)

# Install ephemral package in Python of ReAgent
cd ../../
pip install -e .

# Install spark package
mvn -f preprocessing/pom.xml dependency:resolve
mvn -f preprocessing/pom.xml package
Going from a static decision plan to a contextual bandit
The Makin' Bacon example provided by the ReAgent documentation is splendid, explaining how we can go from a static pre-configured plan towards a dynamic plan. But what are we actually doing in this example? There are actually 3 phases:
- Start - We are starting out simple with a 52% bacon chance and 48% ribs chance
- This through a simple SoftMax ranker
- We see this by running
heuristic.jsonin the simulator, which returns{'Ribs': 471, 'Bacon': 529}with an average reward of0.363.
- Hindsight Analysis - No Personalization
- When we analyze the clicks, we get:
88 390 266 253forribs_clicked, ribs_not_clicked, bacon_clicked, bacon_not_clicked - This translates into
18%and51%forribsandbaconrespectively on the click-through rate! - Initial Observation here is that we can see that people are more likely to click when they see bacon! (since they aren't rib lovers)
- We can adapt the decision plan!
- We will use a
multi-armed banditthrough theUCB1 bandit ranker - Note: Multi-armed bandits will not take into account any state!
- We now see a score of
0.497or{'Bacon': 926, 'Ribs': 74}- Since we want to show more bacon due to the click-through rate!
- Smart Analysis - Personalization
- Our code has been running for a while now and we found an extra parameter that can help this tune for our customers!
isUserARibLover! If this is1then it's a Ribs lover, else it's a Bacon lover. - After training this through the dqn workflow, we will see that context is now taken into account and we receive a reward of
0.52or{'Bacon': 883, 'Ribs': 117}
We are now done and understand how the ReAgent framework works. Time to get started ourselves! (that is for a later post though)


Comments ()