
Automatically splitting an Audio File into smaller chunks based on silence
Learn how you can split an Audio File into smaller chunks to create an AI dataset

The most important part for Audio Classification is to be able to create a dataset with sounds. To do so, we can easily go to a Video Provider and download the source file as a .WAV file, but how can we now change this source file from a lengthy one (e.g., 200MB+) towards smaller chunks?
For the project I am working on I did just that! So let's go through the process of what I did that resulted in creating smaller chunks of audio from a big audio file.
Downloading the Source File
First, I started by finding a video that was to my interest for my dataset
💡 Interesting files are "Compilation" files as they contain a lot of the audio that we require.
Once we found such a file, we can download it straight to the .WAV file. For this, I utilized https://youtubeto.org/en/youtube-wav.html which resulted in a ~250MB .WAV file.
Splitting the Audio File on the Silent Parts
Now the most interesting part is to split this file into smaller chunks. Go and install https://www.audacityteam.org/ which is an Audio Editor that is going to help us tremendously!
💡 This works best when there is a small "gap" in between audio fragments
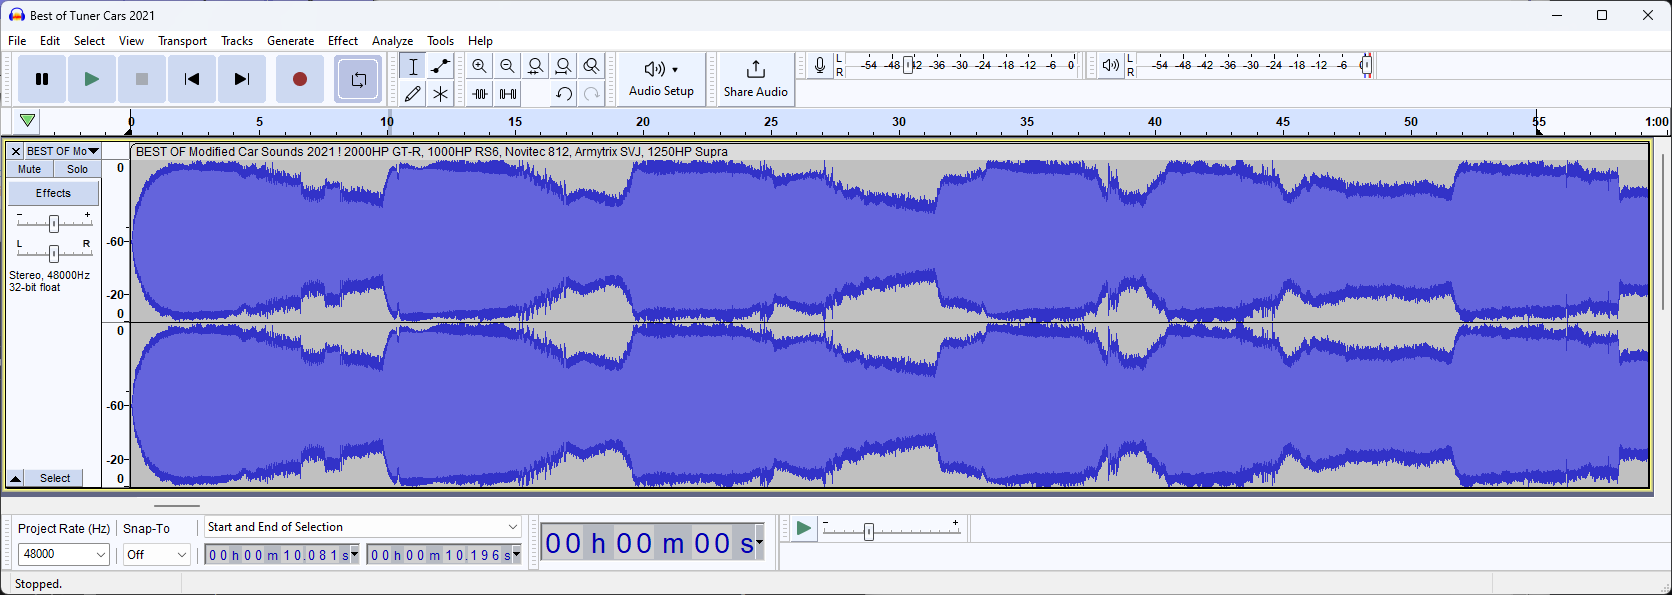
Once installed, open your file in Audacity

This will open the spectrogram in a normalized linear view. Now, to make our lives easier we can switch this to a logarithmic dB view by right-clicking on the vertical scale and selecting "dB"

To split our sound, we need to know which dB level we will mark as "silence" so once we got our dB view open, let's zoom in a bit

Analyzing this view, we can see that the sound goes "silent" around the -20dB mark.

This silence also takes around ~0.5s in the -20db range
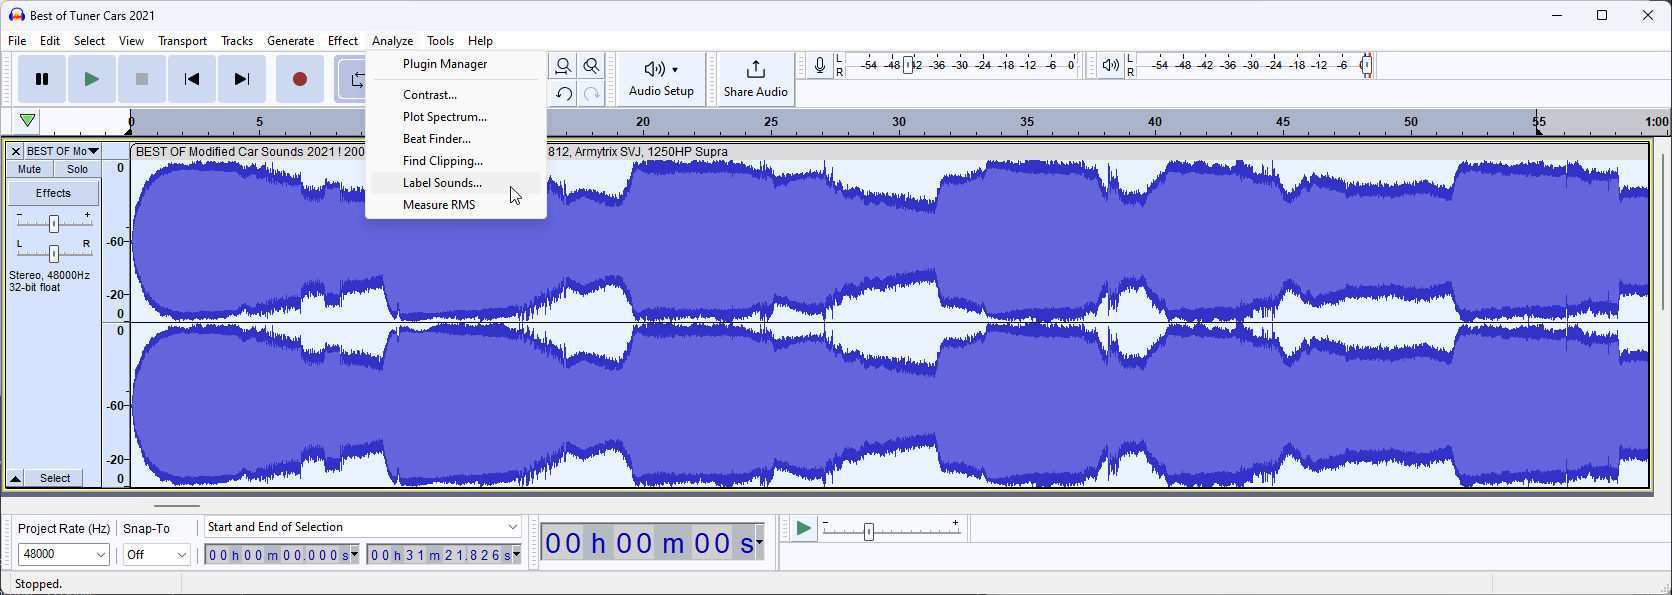
Now we know this, press CTRL+A to select the track and open "Label Sounds" by going to Analyze -> Label Sounds

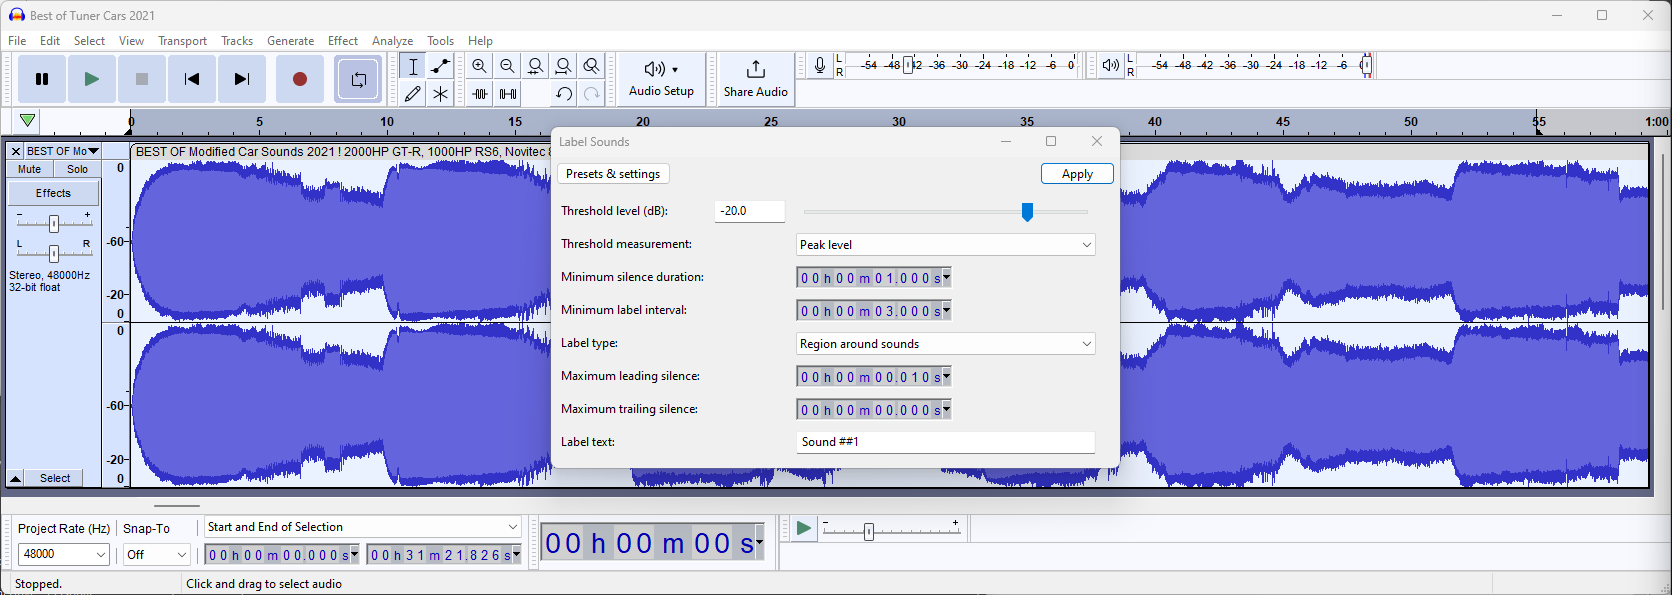
In the pop-up that opens, enter the dB and time we detected earlier.
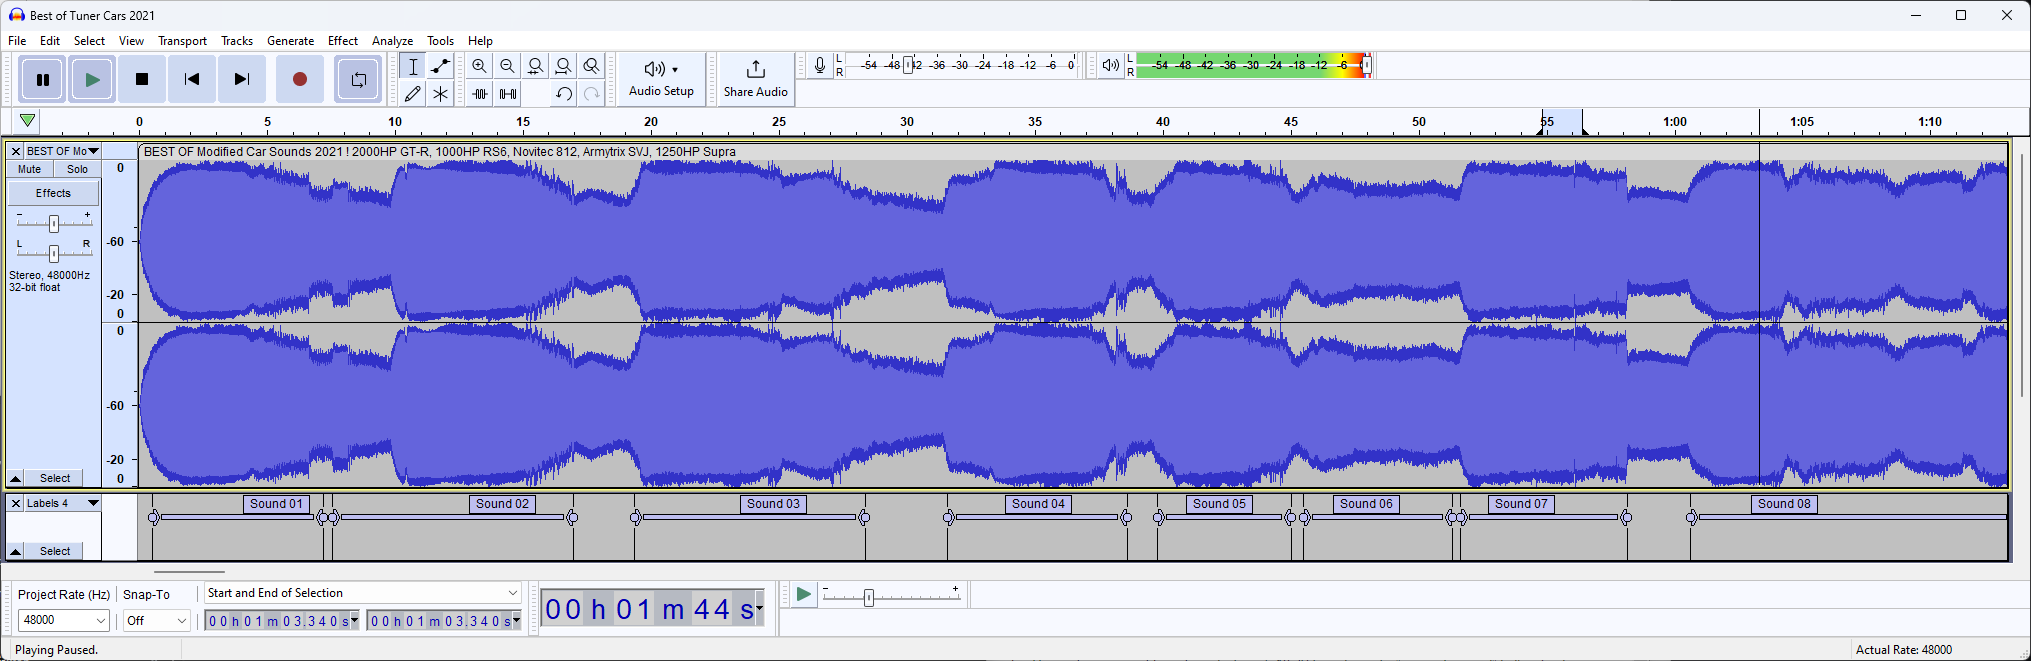
After clicking "Apply" the audio frame will be split into chunks:
💡 If you are unhappy with the result, redo these steps and play with the dB and Silence Duration settings
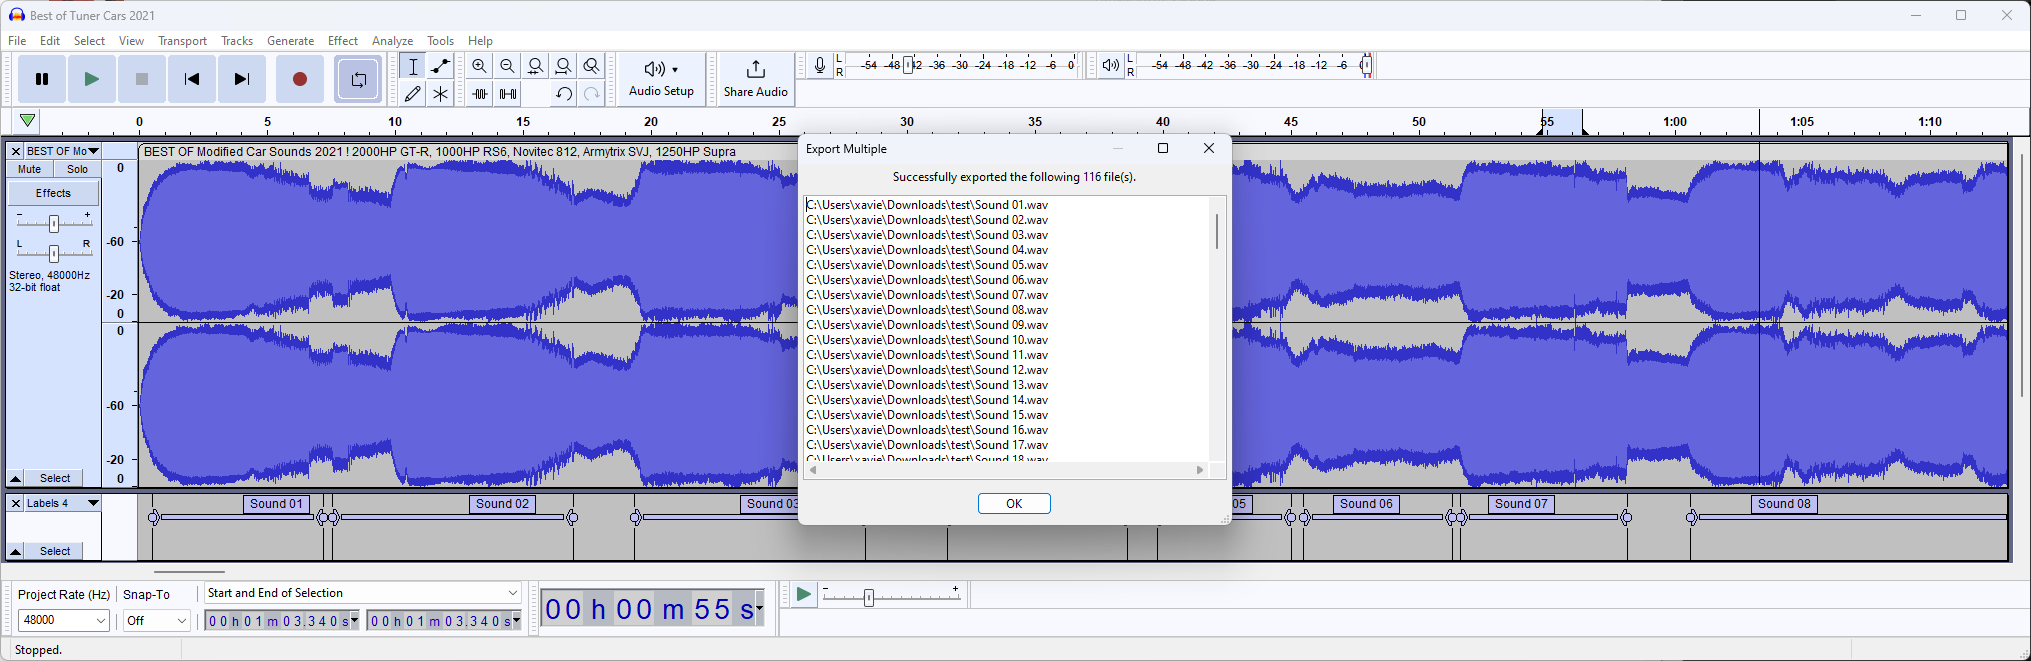
Now to export our chunks, we can go to File -> Export -> Export Multiple to get our chunks and click Export.

If successful, we will now see our exported files:
Summary
We now have split up a huge WAV file in smaller chunks and are ready to utilize them in our dataset!


Comments ()