
Act in realtime on IoT Data without writing any code through Azure IoT Hub, Event Grid, Cosmos DB and Logic Apps

Creating a realtime application is quite trivial, you most of the time take in all the events and put a dedicated processor on there that will process the incoming events for you. But what if you would like to make things a bit more interesting and develop this entire path completely serverless without writing any code, but still ensuring a response of seconds rather than minutes?
Let's take the following use-case: "We have devices sending telemetry (temperature) and would like to send an email to ourselves once the temperature exceeds a certain threshold". How can we do this?
Architecture
Decomposing this into an architecture definition, we would need to take the following requirements into account:
- No coding (thus no Azure Functions)
- Serverless
- Response time < 3 seconds
- Completely managed (no IaaS)
If we take the requirements above, the following components might be sufficient:
- Azure IoT Hub (as our device management and event ingestion engine)
- Azure Event Grid (as the Telemetry router)
- Azure Cosmos DB (as our Device Metastore that will include the location)
- Azure Logic Apps (as our no-code platform that will include our logic)
- Twilio Sendgrid (for our email sending needs)
Which will result in the following architecture:

Data Flow / Data Model
Once we have our architecture defined, another thing we also should do upfront is to create the data flow and model that will be representing our device metadata store as well as the events coming in.
Device Metadata Store
Our devices are going to be registered in IoT Hub, but we also need a Metadata store containing some extra information such as the location. This way we can send which device is actually overheating at which location for example.
Since we are utilizing a NoSQL store, this could look something like this:
{
    "id": "simulator-device",
    "owner": {
        "id": 1,
        "name": "Xavier Geerinck",
        "email": "[email protected]"
    },
    "location": {
        "id": 1,
        "country": "BE",
        "address": "Street 1, 2345 City"
    }
}
Device Events Telemetry
For the device events, this is going to look quite simple and small, so that we are able to create a low ingestion engine that could also be compatible with technologies such as LoRa or NB-IoT.
Our payload could look something like this:
{
    "deviceId": "my-first-device",
    "temperature": 20.5
}
Implementation
Setting up our components
Getting started, we always start off creating the components as described in our architecture overview diagram. We thus create the following components:
- Azure IoT Hub
- Azure Event Grid
- Azure Cosmos DB
- Azure Logic Apps
- Twilio Sendgrid
Configuring Logic Apps
Quick Introduction
Logic apps is a no-code platform that allows you to get started by just combining triggers and actions. As shown in the overview below.
- Triggers: These will trigger the logic app to start (e.g. receiving an event, a timer, a webhook, …)
- Actions: This is what will occur in the connector (e.g. fetching a document, deleting a document, …)
After we run one of these actions we will need to be able to receive the response of them. This we can do through the use of "Magic Variables" that we can call in expressions. The ones we will use are:
TriggerBody(): Returning the output of the triggerBody('ActionName'): Returning the output of an action further in the flow
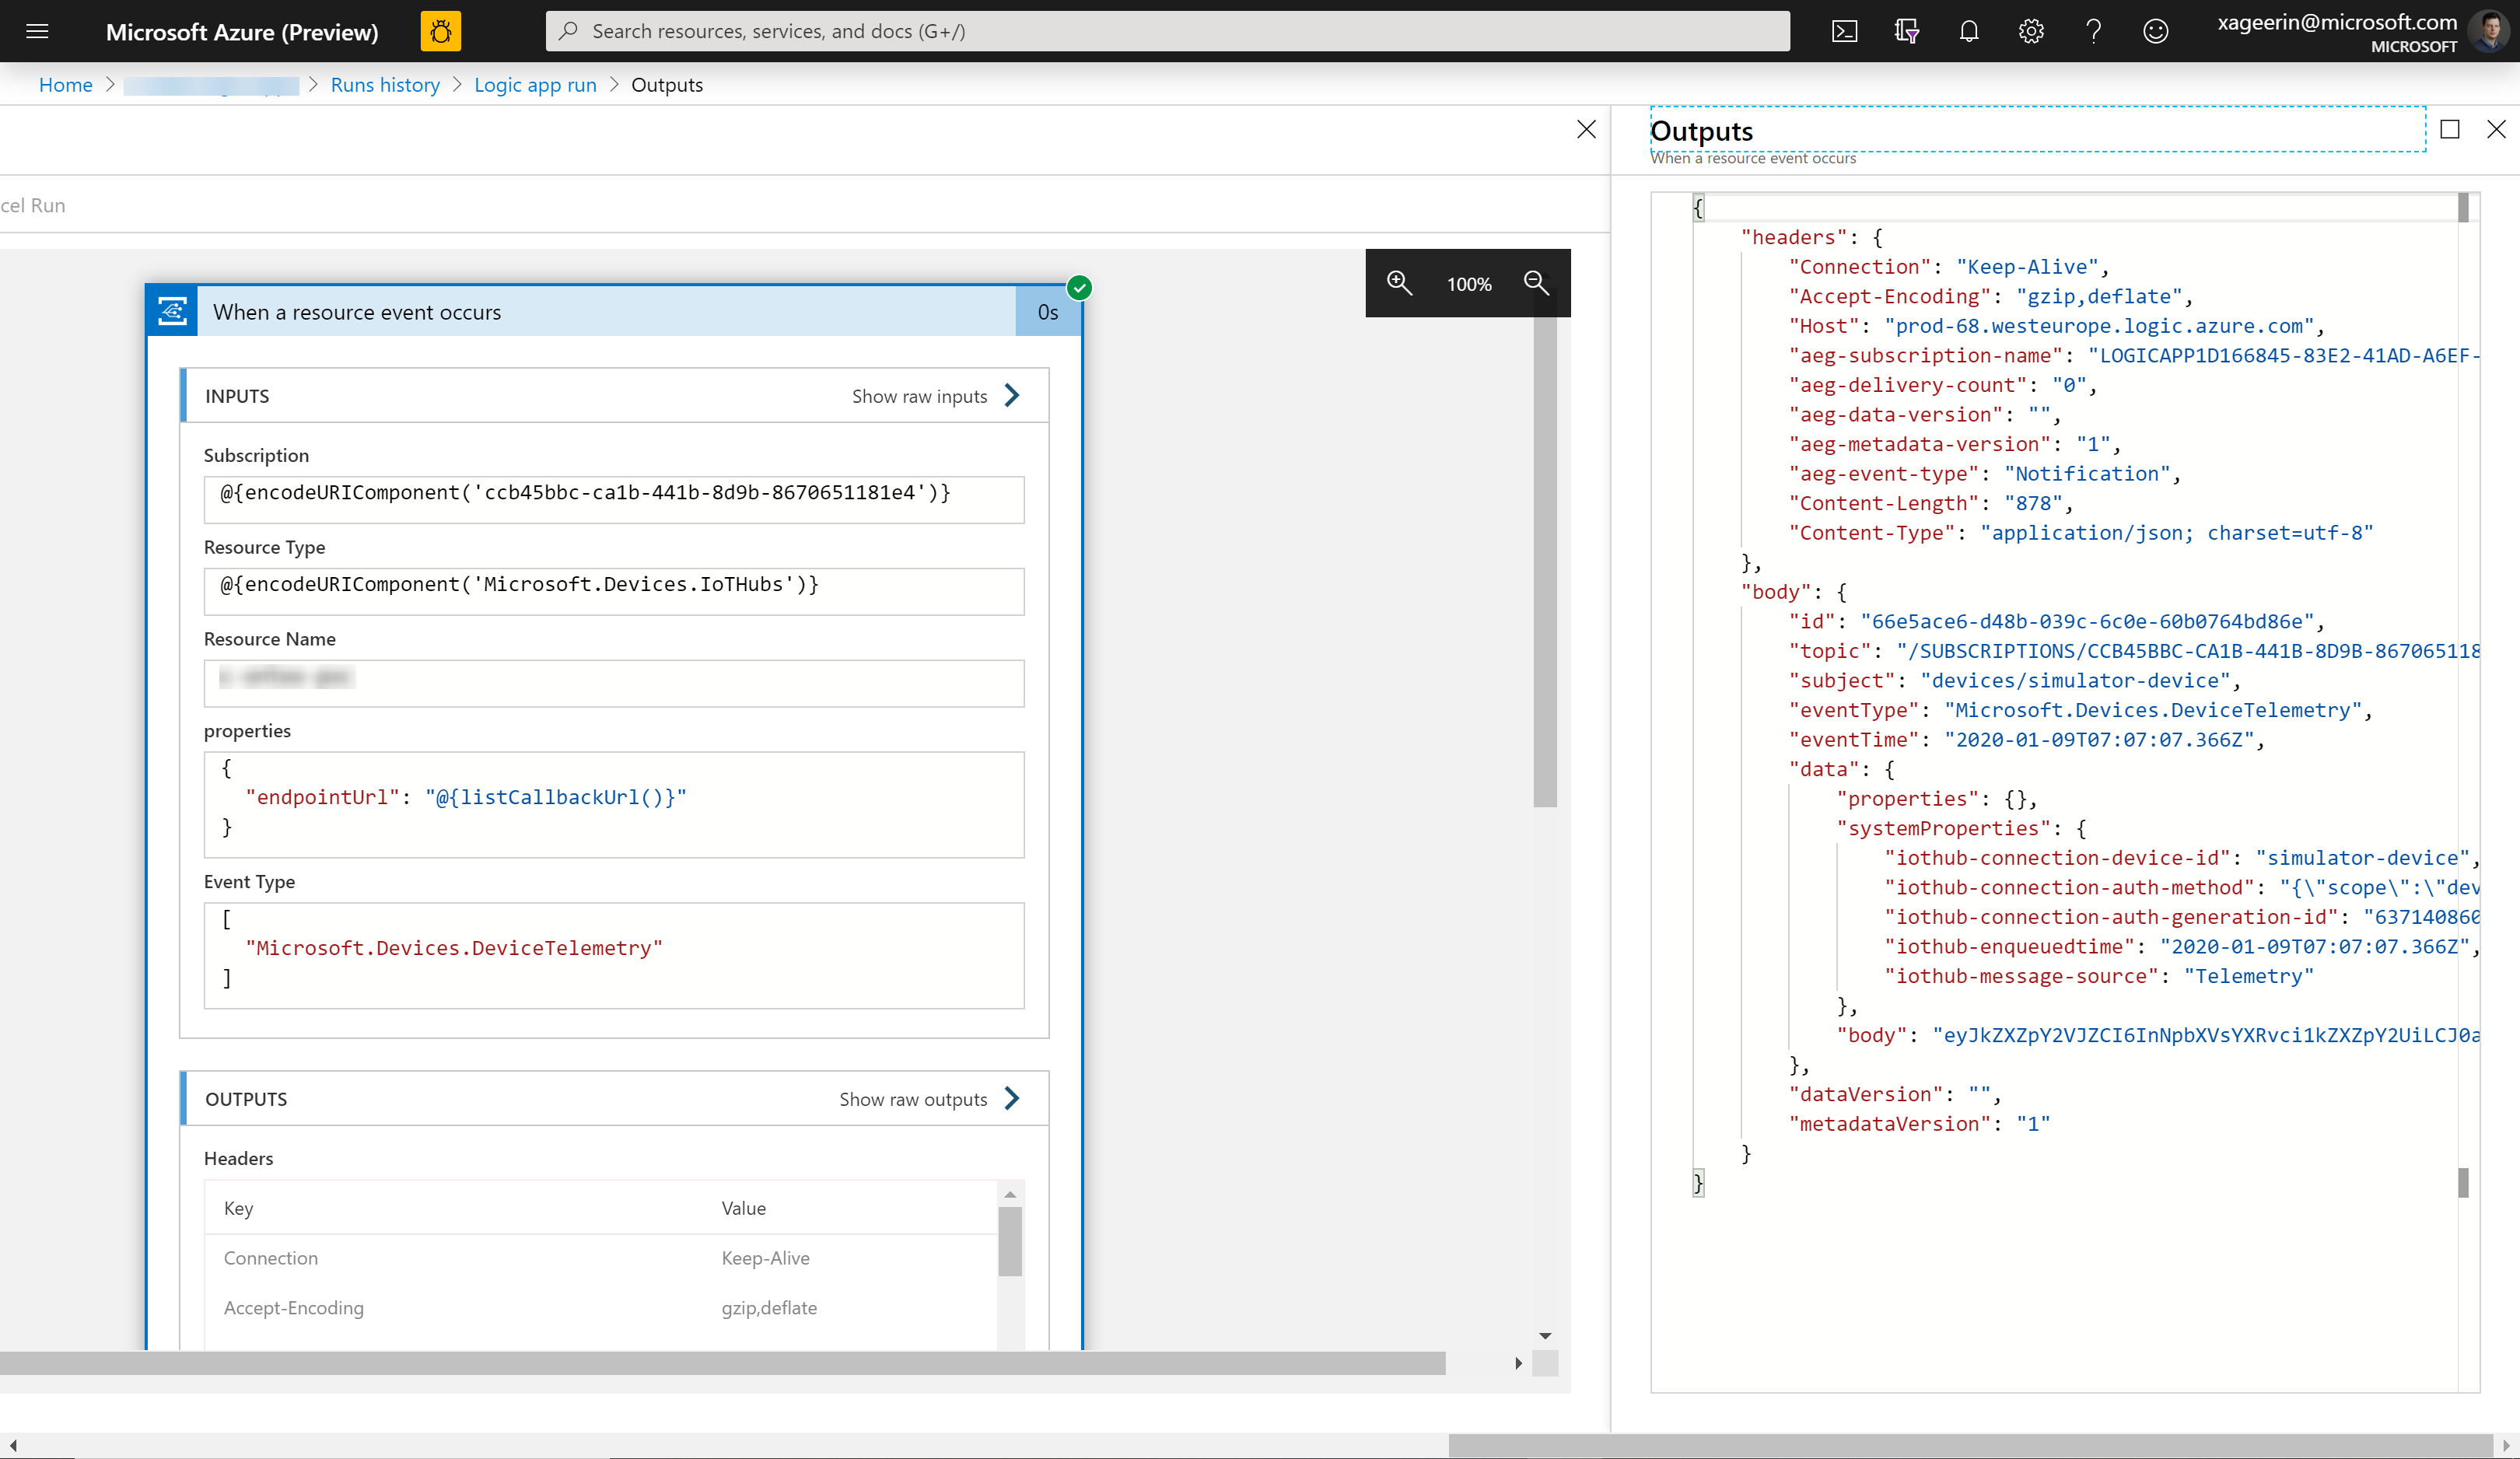
To know what the keys are that we can utilize, we should go towards the Run History view that will allow us to deep dive in each connector to see what was being shown in the "input" and "output":
Configuring it for our Use Case
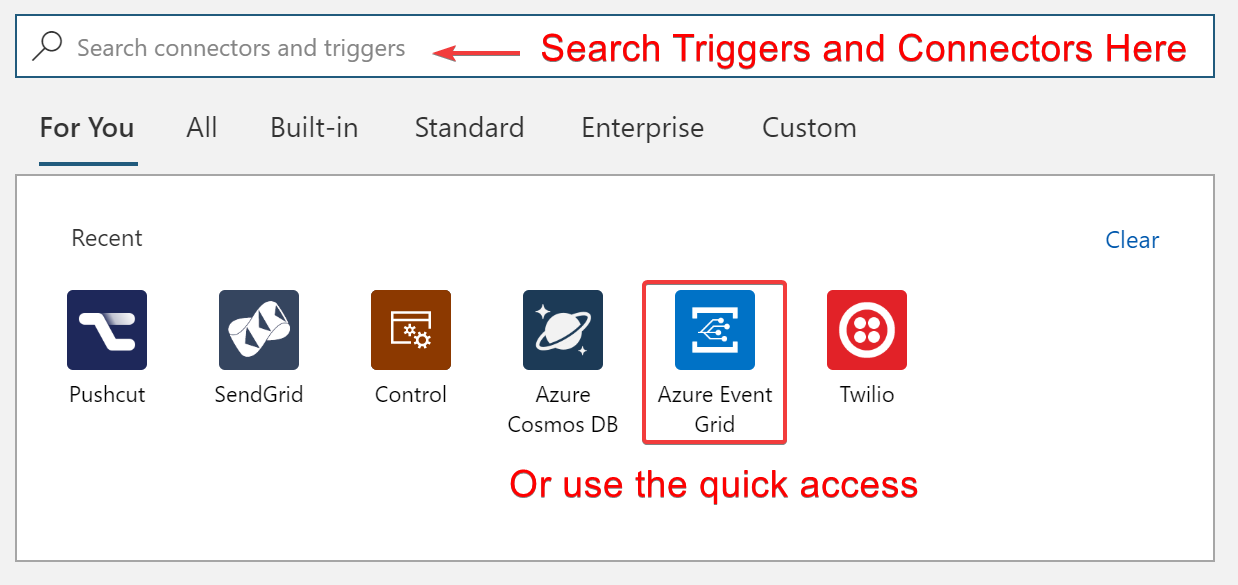
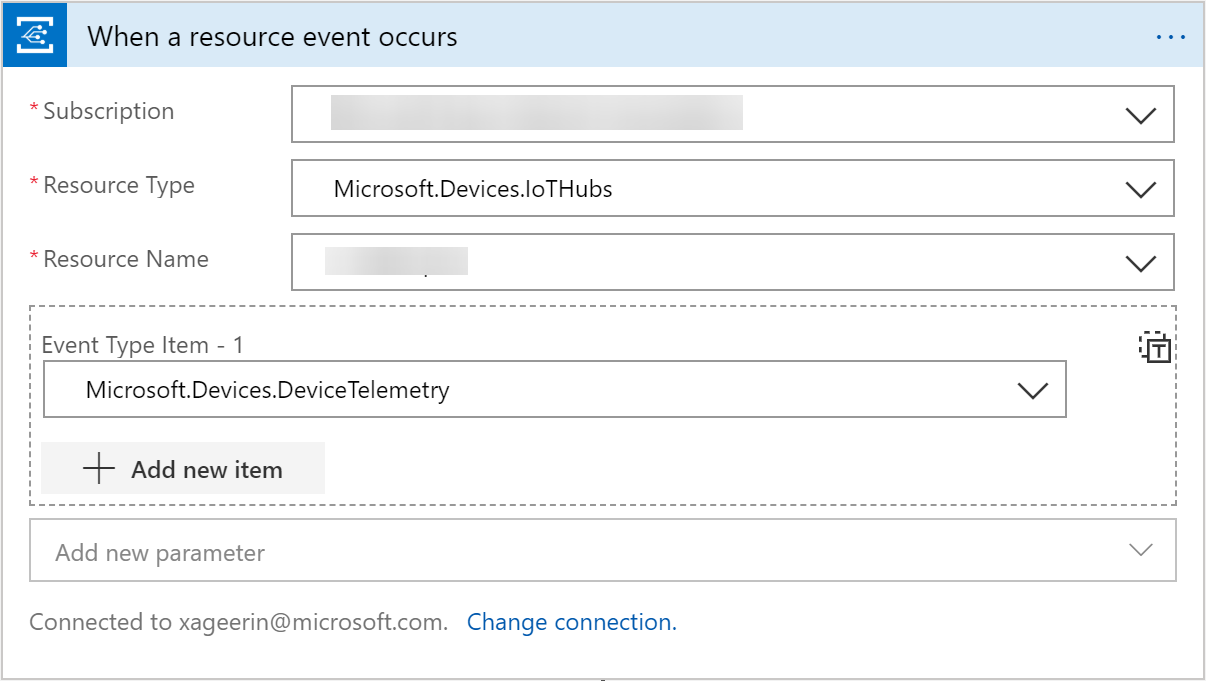
Now let's configure this for our use-case. We select "Event Grid" as our trigger and "When a resource event occurs" as the action we will take. Configuring it as shown below.
This will automatically set-up the connection from IoT Hub towards Event Grid for us, so that we are able to focus on more important things. From the introduction, we have now learned that we can access the output of our Event Grid Trigger through the function TriggerBody().
Looking at what we got in the run history output, we can see the JSON structure below. Which shows that IoTHub is including a body key that includes the data as a base64 string.
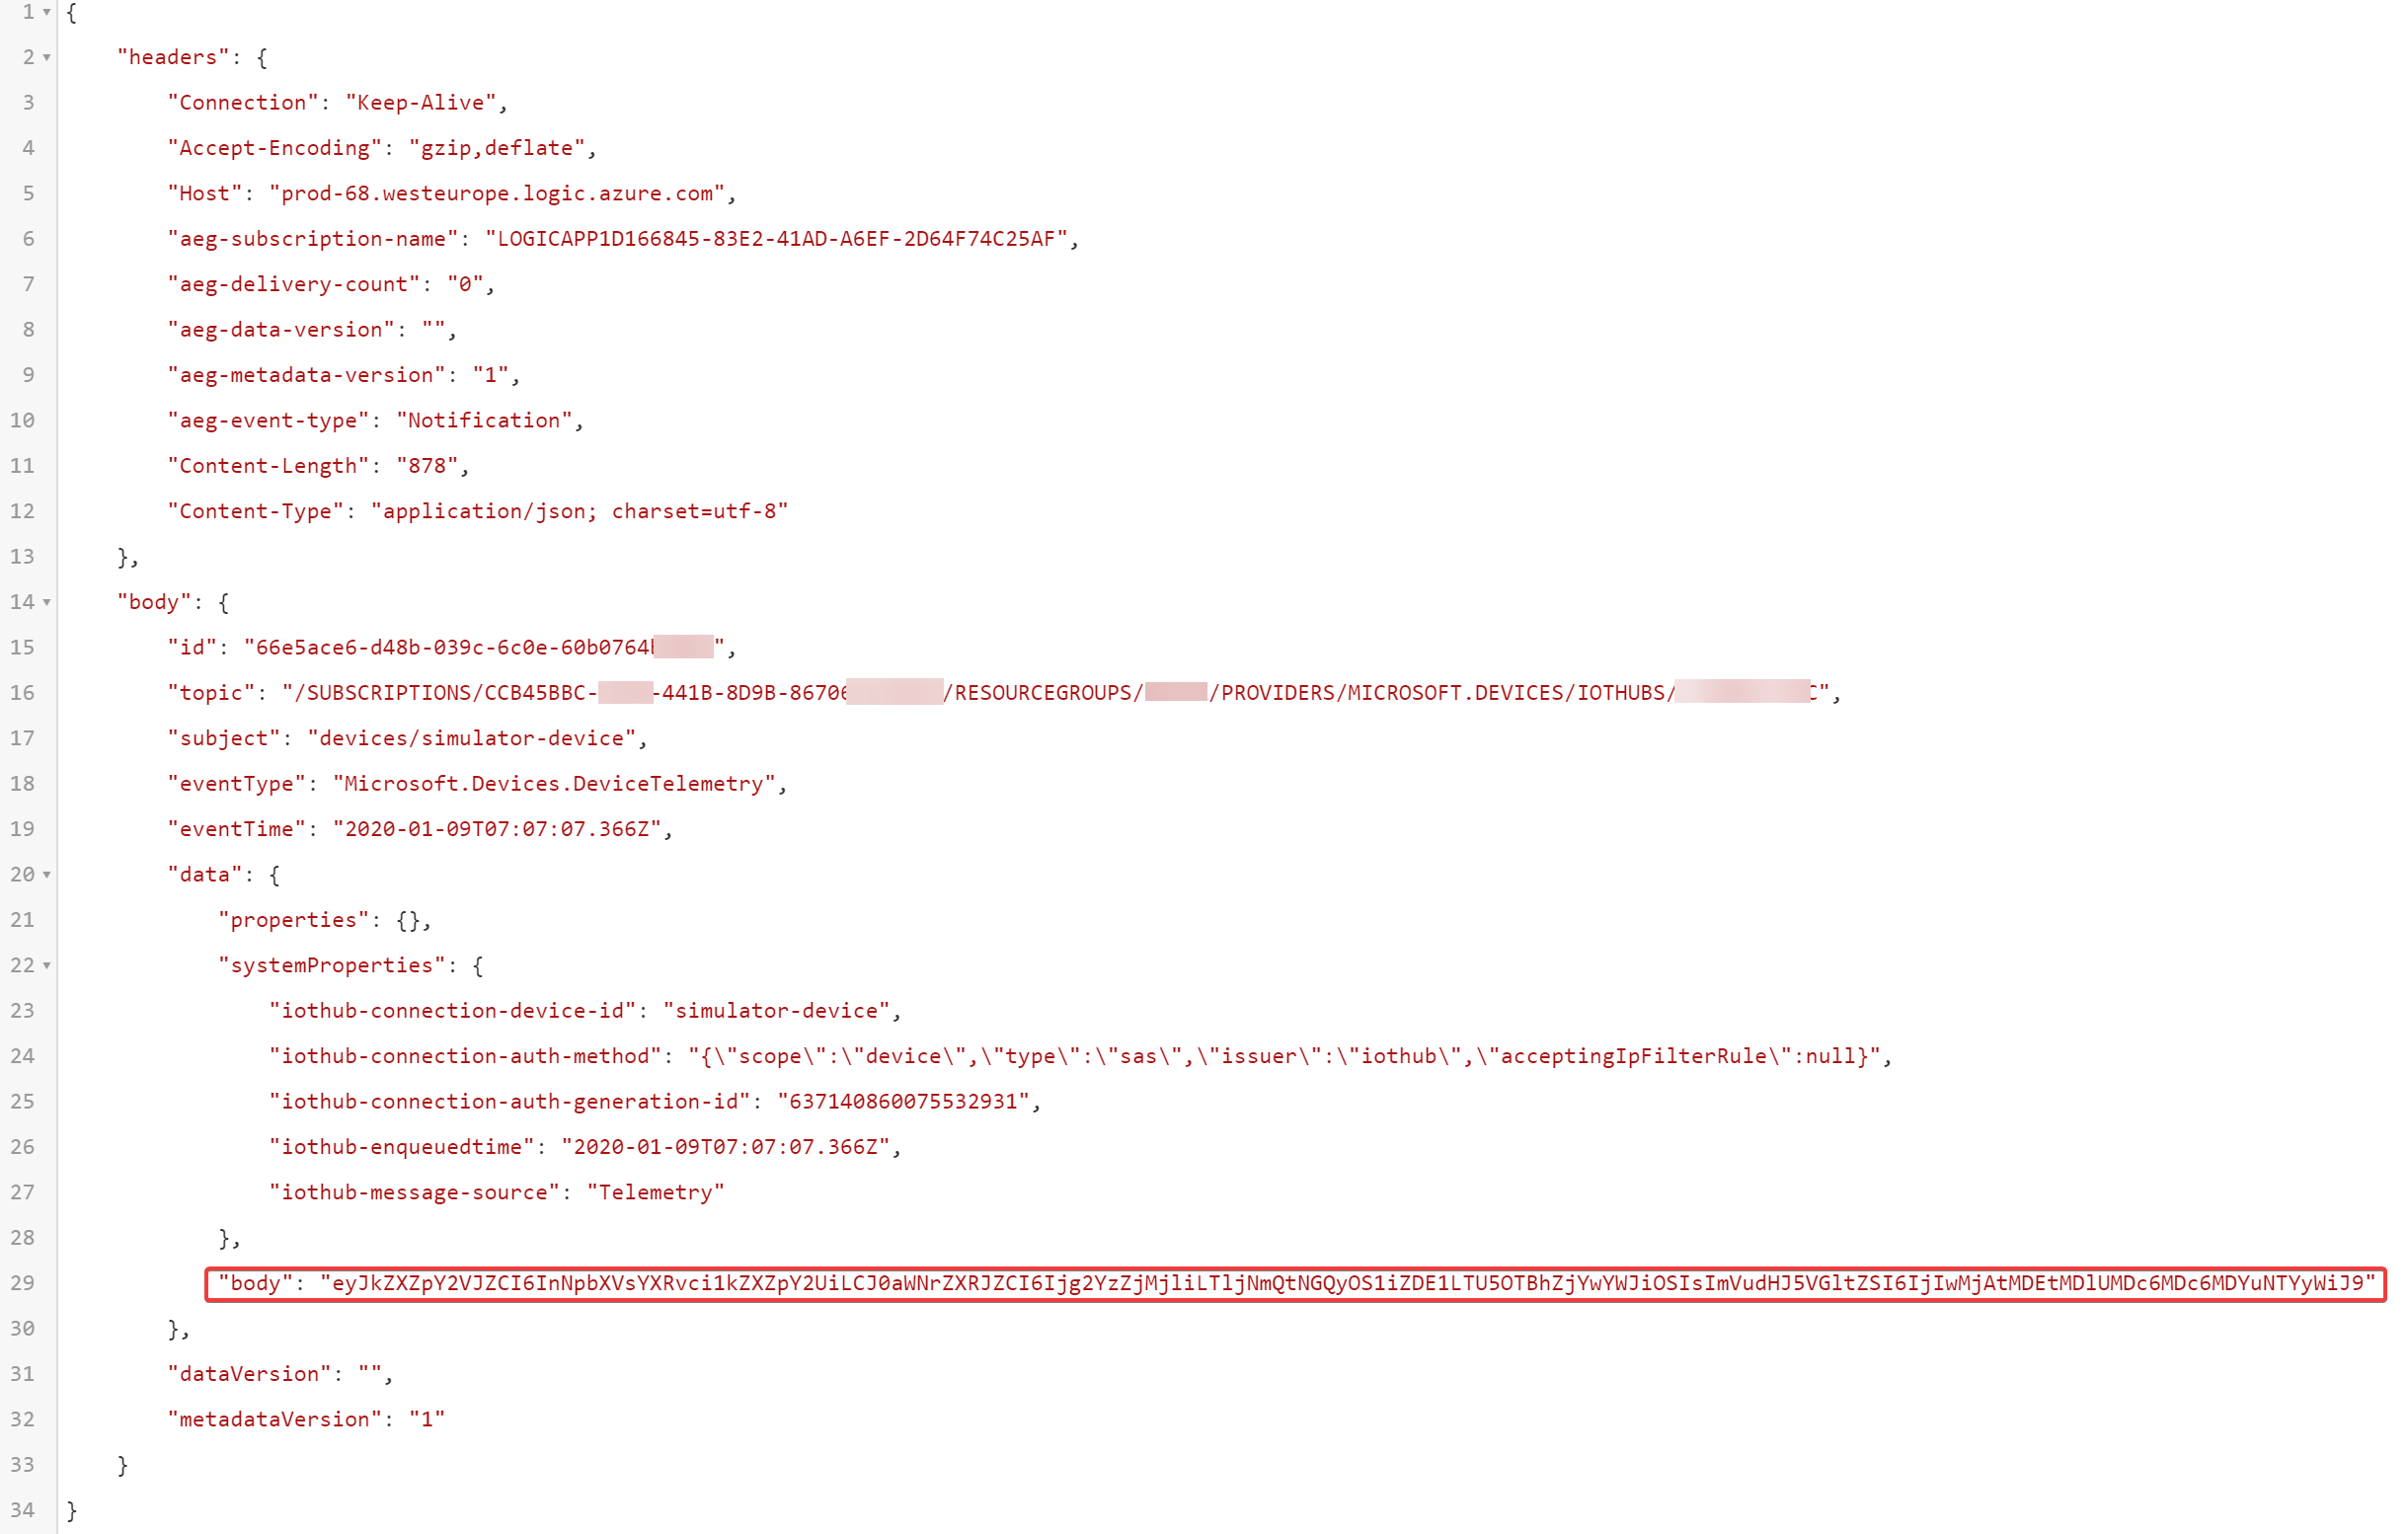
To decode this, we can thus utilize the following expression: json(decodeBase64(triggerBody()['data']['body'])) which deserializes the base64 string and parses it as a JSON document.
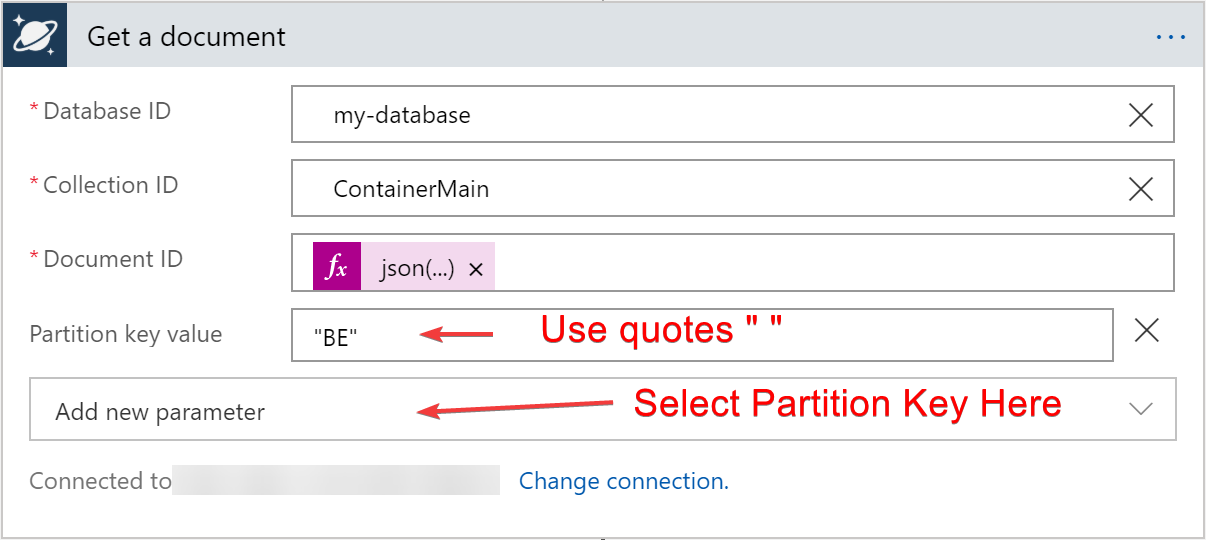
Continuing, we set-up our CosmosDB action. Selecting the Get A Document (or shorted noted as Get_a_Document since we need this for accessing the result). To help you a bit, I have listed the parameters below.
- Database ID:
YOUR_DATABASE_ID - Collection ID:
YOUR_COLLECTION_ID - Document ID:
json(decodeBase64(triggerBody()['data']['body']))['deviceId'] - Partition Key Value:
"BE"
Resulting in:
The same goes for our Condition Statement, which will focus on a value we put in (e.g. temperature_pct) which we can compare to another value (e.g. 79 as shown below).
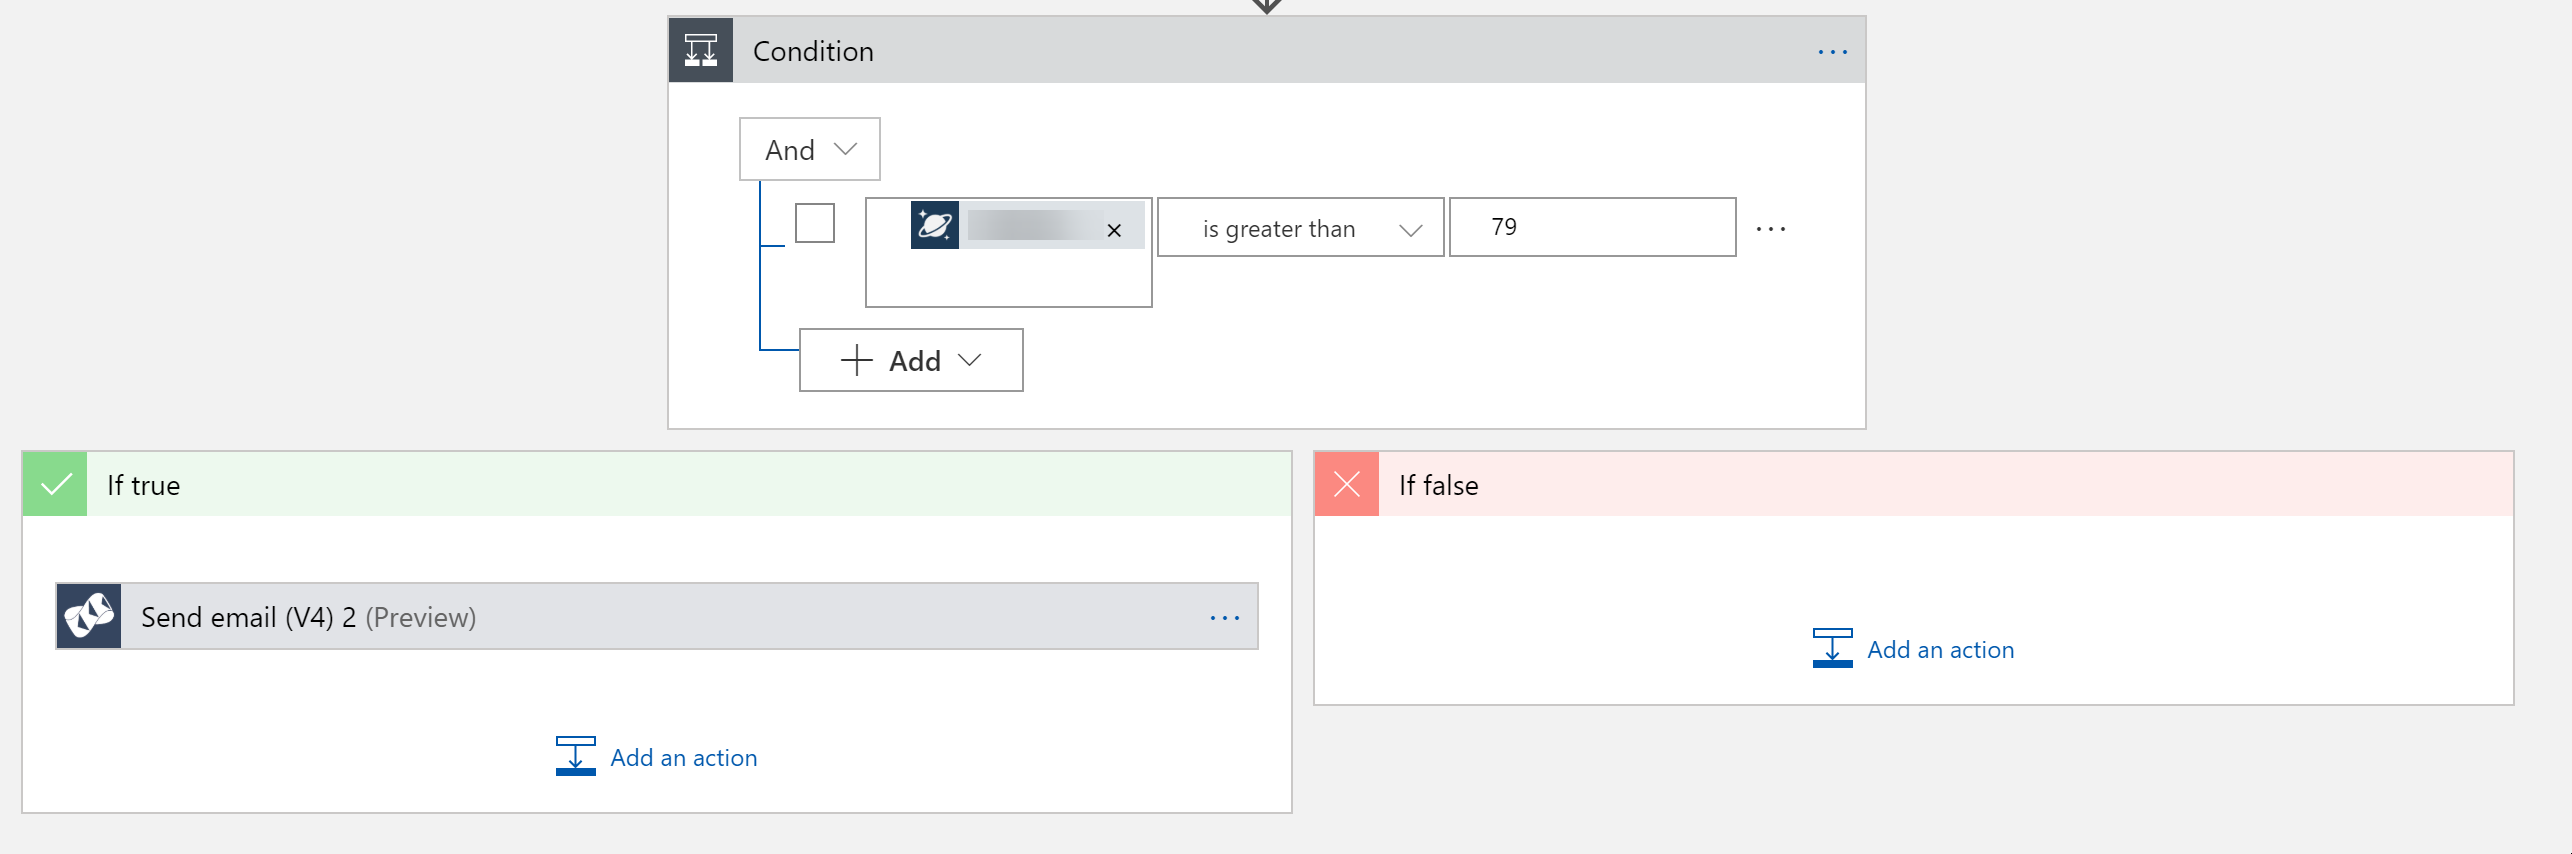
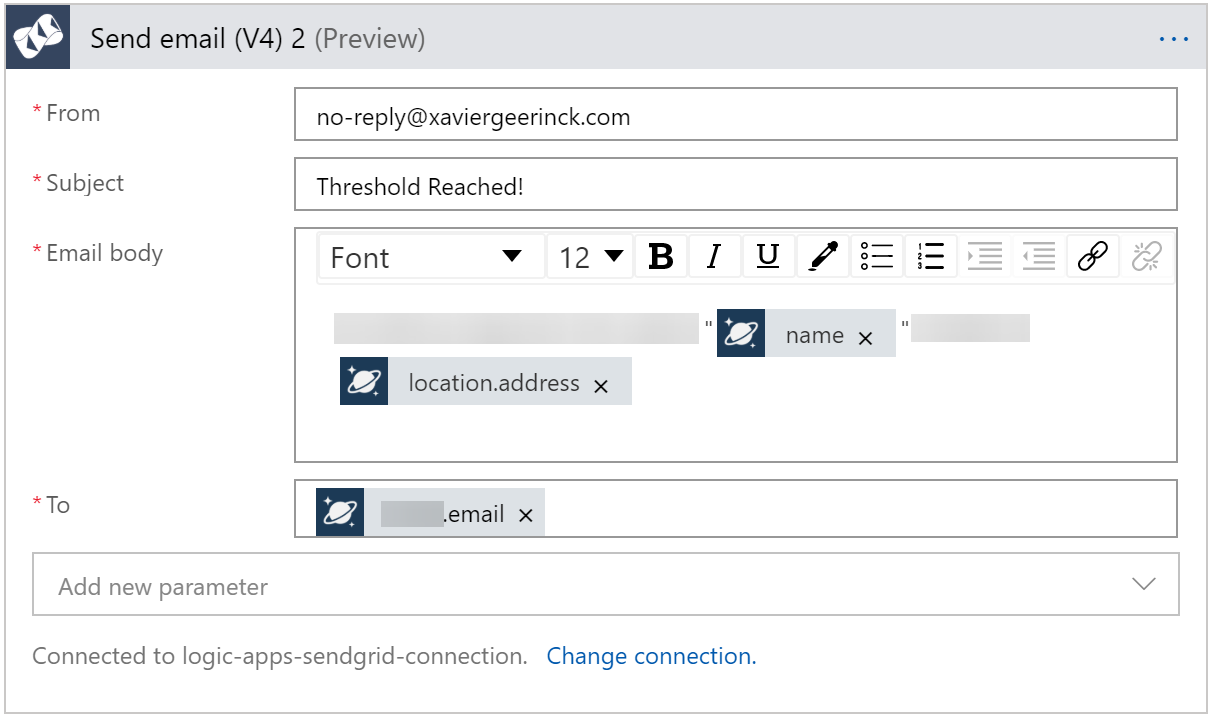
With the last step being that when the condition above is true, that we send an email to the email we fetched from CosmosDB.
Remember: you can access the CosmosDB data throughBody('Get_a_Document'), e.g.:Body('Get_a_Document')['customer']['email'].
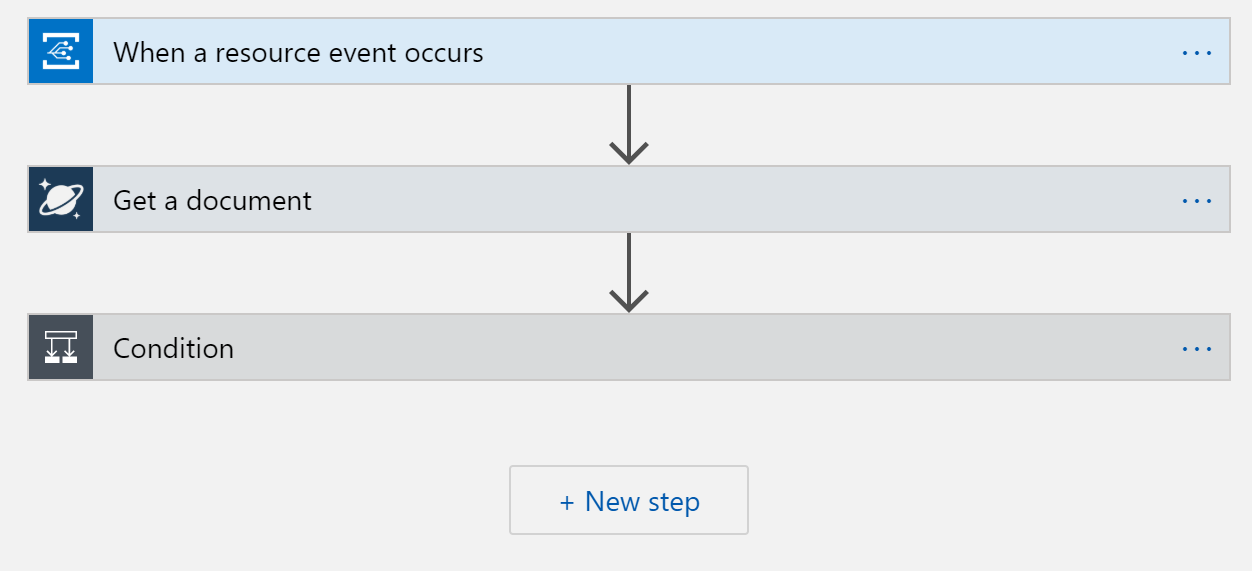
Finally resulting in our finished flow:


Comments ()