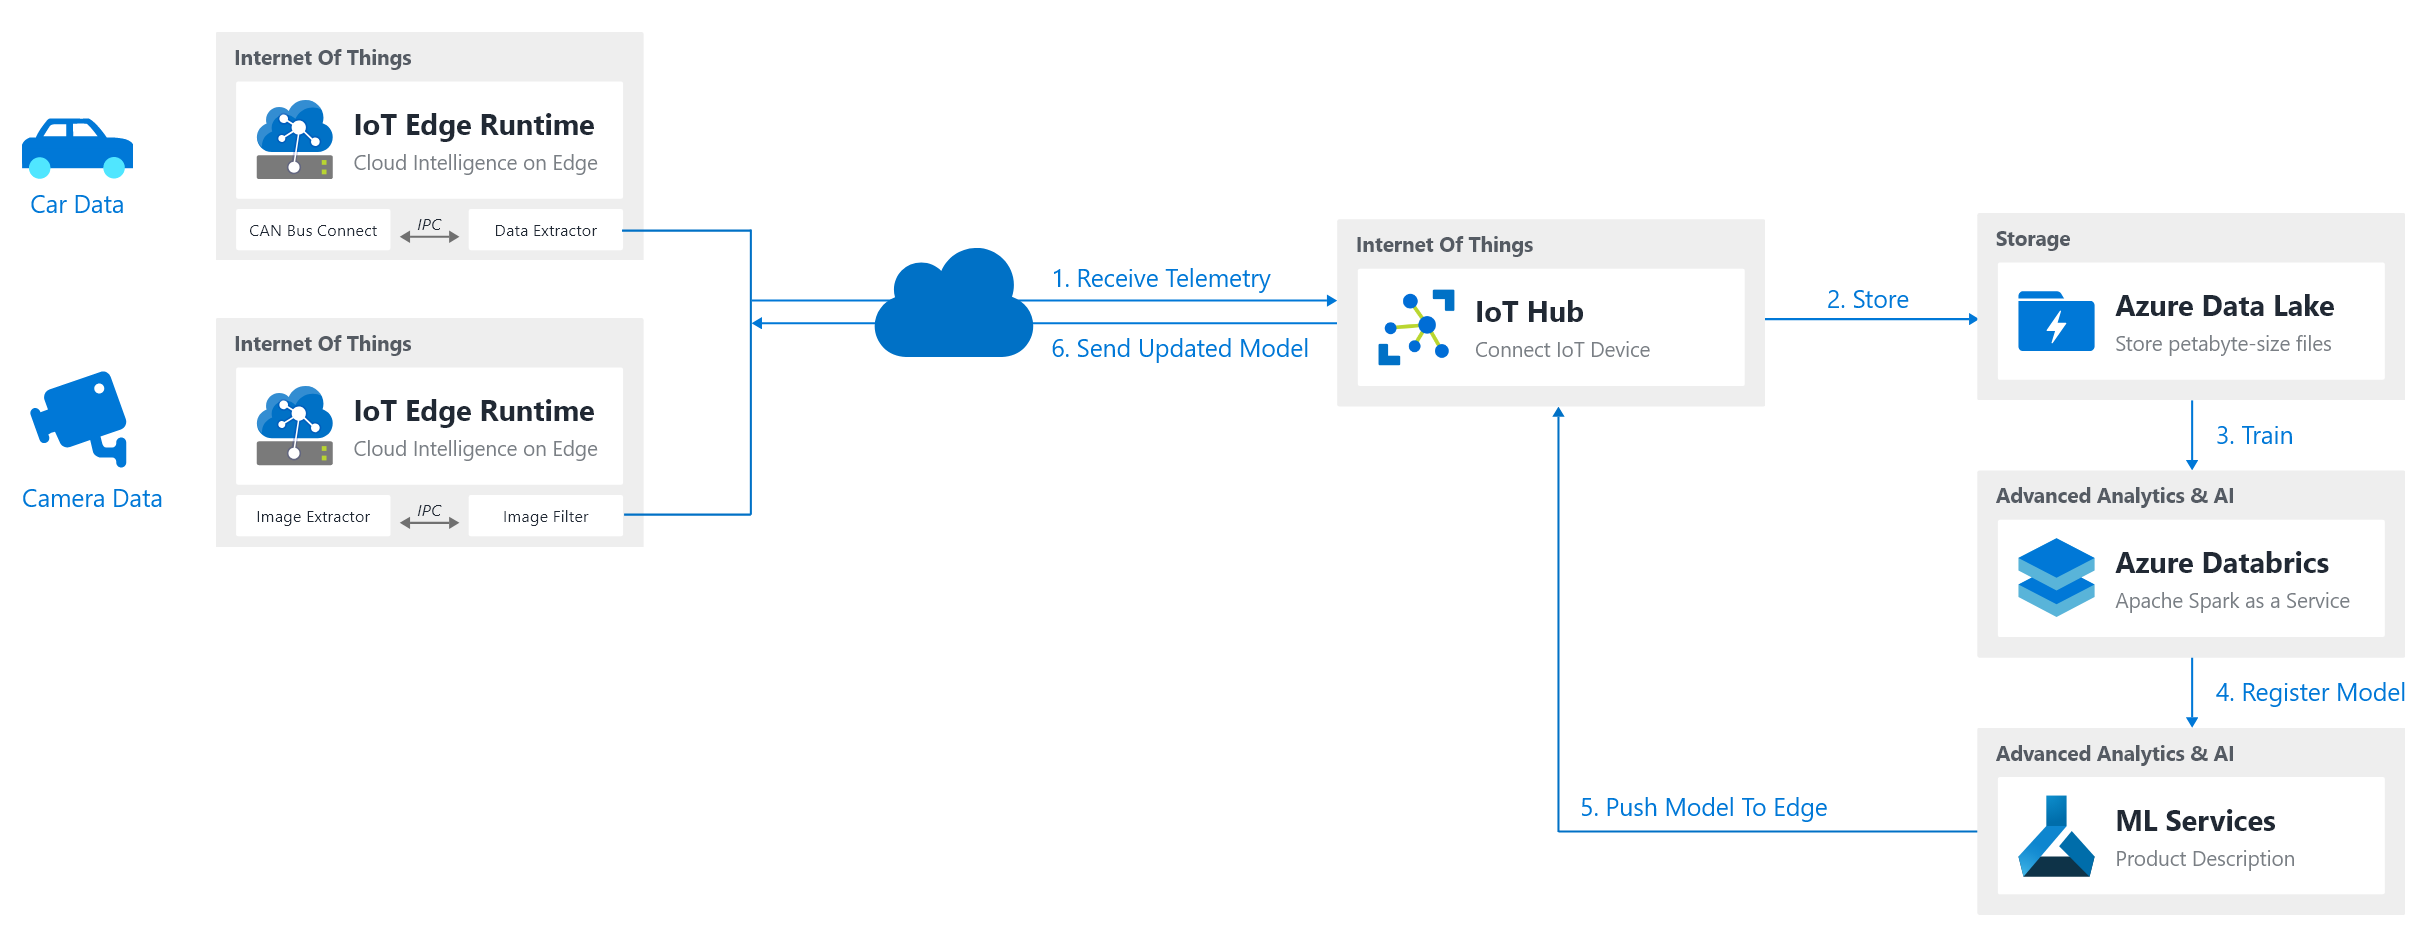
Part 3 - Creating a Car Camera simulator in IoT Edge

This is Part 3 in the Iot Edge series, view the main article or go the part 2 to view the previous article.

Recap and next steps
In part 2 we created our car data simulator that will send data points every second from a CSV file. Next up is a second simulator that will create a video as a camera would do and save it on disk, so that a processor can use it.
Unique here is that we will be utilizing this to create a video stream that is utilizing a shared folder through Azure IoT Edge createOptions
Initial Setup
Our Video simulator will utilize some of the code from the previous simulator. However since we are using video frames here, we should not send them straight to cloud, nor should we use MQTT to send them to our device hub. A more efficient way is that we create a video from these frames (as a camera would do, but rather than creating a video it would then stream to a /dev/ interface) and save this video to a shared path that another module can read.
Remember: our edge device has it's own hub, and runs modules (containers). We can thus use the underlying OS running our modules as a "share" and mount a shared path (e.g. /tmp) to these modules. If our module A would then write to this mount, module B would be able access it as well.
Configuration
For our creation of this module, we will use the following settings:
- Path:
/home/xavier/iot-edge - Solution: EdgeSolutionCameraFilter
- Module Template: C# Module
- Module Name: ModuleSimulatorCamera
- Docker Repository:
xavierregistry.azurecr.io/module-simulator-camera
Data Gathering
For the data that will be used for the video we will - as mentioned before - again utilize the data from https://github.com/cloudpose/smartphonedrivingdataset. This provides us a dataset of 3,419 images. Now for simplicity reasons we will only get a couple of frames (~10Mb) in our data folder (as in the previous simulator). I chose the following frames:
- output_141.png
- output_197.png
- output_340.png
- output_384.png
- output2535.png -> output2560.png
FYI: I use a remote development PC, so to copy these files specifically I had to copy them to a SSH terminal. To do this I used: scp *.png xavier@<SERVER_IP>:/home/xavier/iot-edge/EdgeSolutionCameraFilter/modules/ModuleSimulatorCamera/dataCoding our Simulator
Configuring the deployment template + Dockerfile for our stream path
Our code is mostly a copy paste of the previous code. The only thing that will change here is that we will have to send the images to the next module.
Important: As mentiond in our Initial Setup, we should NOT use MQTT to send all these messages to cloud. Rather than that we should utilize a mount to provide a path that we can write our video to.
To access our shared path from the OS (/tmp) in our module under /app/stream we will have to specify this in our module's deployment file deployment.template.json. Luckily a key called createOptions exists that allows us to do this (see https://docs.microsoft.com/en-us/azure/iot-edge/module-edgeagent-edgehub for more information).
This will look like this to mount the /tmp folder to our /app/stream path:
"modules": {
  "ModuleSimulatorCamera": {
    "version": "1.0",
    "type": "docker",
    "status": "running",
    "restartPolicy": "always",
    "settings": {
      "image": "${MODULES.ModuleSimulatorCamera}",
      "createOptions": {
        "HostConfig": {
          "Mounts": {
            "Target": "/app/stream/",
            "Source": "/tmp"
          }
        }
      }
    }
  }
}
Next we will adapt our Dockerfile.amd64 (and Dockerfile.arm32v7) to add the following above the ENTRYPOINT statement, as well as add the dependency on ffmpeg:
# Add streaming directory
RUN mkdir -p /app/stream

# Install ffmpeg
RUN sudo apt-get install ffmpeg
Program.cs
Our Program.cs is quite trivial, since we will let ffmpeg handle the difficult part of merging our frames from the data/ folder into a video file. Putting this into the same kind of framework as we did in our first simulator, makes us ending up with:
static string videoDestinationPath = "/app/stream/out.mp4";

// ...

static async Task Init()
{
    MqttTransportSettings mqttSetting = new MqttTransportSettings(TransportType.Mqtt_Tcp_Only);
    ITransportSettings[] settings = { mqttSetting };

    // Open a connection to the Edge runtime
    ModuleClient ioTHubModuleClient = await ModuleClient.CreateFromEnvironmentAsync(settings);
    await ioTHubModuleClient.OpenAsync();
    Console.WriteLine("IoT Hub module client initialized.");

    // Start our simulator
    // Note: this is not async, we can run on the main thread
    StartSimulator(ioTHubModuleClient, "data/");
}

static void StartSimulator(ModuleClient ioTHubModuleClient, string filePath)
{
    // Get the images that we want to convert to a video stream
    string [] fileEntries = Directory.GetFiles(filePath);

    var process = new Process()
    {
        StartInfo = new ProcessStartInfo
        {
            FileName = "ffmpeg",
            Arguments = $"-y -framerate 1 -pattern_type glob -i {filePath}/*.png -c:v libx264 -r 30 -pix_fmt yuv420p -vf \"pad=ceil(iw/2)*2:ceil(ih/2)*2\" {videoDestinationPath}",
            UseShellExecute = false,
            CreateNoWindow = true,
        }
    };

    // Compile the video
    // Console.WriteLine($"ffmpeg -y -framerate 1 -pattern_type glob -i {Directory.GetCurrentDirectory()}/{filePath}*.png -c:v libx264 -r 30 -pix_fmt yuv420p -vf \"pad=ceil(iw/2)*2:ceil(ih/2)*2\" {videoDestinationPath}");
    Console.WriteLine($"[Simulator][{DateTime.Now.ToString("g")}] Creating video file from images in {filePath}*.png");
    process.Start();
    process.WaitForExit();
    Console.WriteLine($"[Simulator][{DateTime.Now.ToString("g")}] Wrote video file to {videoDestinationPath}");

    // Wait a minute before we repeat
    Console.WriteLine($"[Simulator][{DateTime.Now.ToString("g")}] Waiting 60 seconds before repeating");
    System.Threading.Thread.Sleep(60 * 1000);
    StartSimulator(ioTHubModuleClient, filePath);
}
We can see that we will just create our process in C# and wait till it finishes. Once it finishes we will wait 60 seconds before redoing this complete process.
Note: We wait one minute for this simulator, since we could for example make the data/ folder receive frames from a mount as well, potentially allowing for a dynamic recompilation process.Deploying our Simulator
Just as before, we can now deploy our simulator:
- Login to our container repository:
sudo docker login -u <USERNAME> -p <PASSWORD> <LOGIN_SERVER> - Right click on
deployment.template.jsonand:Build and Push IoT Edge Solutionwhich will initiate adocker build --rm -f "/home/xavier/iot-edge/EdgeSolutionCameraFilter/modules/ModuleSimulatorCamera/Dockerfile.amd64" -t xavierregistry.azurecr.io/module-simulator-camera:0.0.1-amd64 "/home/xavier/iot-edge/EdgeSolutionCameraFilter/modules/ModuleSimulatorCamera" && docker push xavierregistry.azurecr.io/module-simulator-camera:0.0.1-amd64command. - Right click on our device in the Azure IoT Hub Extension and click
Create Deployment for Single Deviceand navigate to the path of our solution config deployment. E.g./EdgeSolutionCameraFilter/config/deployment.amd64.json
Congratulations, our Camera Simulator is now finished! Let's get started on our Machine Learning Model!


Comments ()