
Creating an Azure Data Lake Gen 2 File Browser for the Web

While working with Azure Data Lake Gen 2 (ADLS Gen 2), I saw that one common ask from the people around me is to be able to interact with it through a web portal. As Microsoft we offer customers the chance already to utilize a tool called "Azure Storage Explorer" but this is a tool that is only available for on-premise systems. What I want to show here is how to create a web portal that can be used for the following use cases:
- Enable your customers to drop files / folders through a web portal with credentials provided by you
- Manage your Data Lake through an online web portal
- Allow your employees to manage the Data Lake without requiring a tool to be installed (not all employees can install applications on their PCs)
Preview:
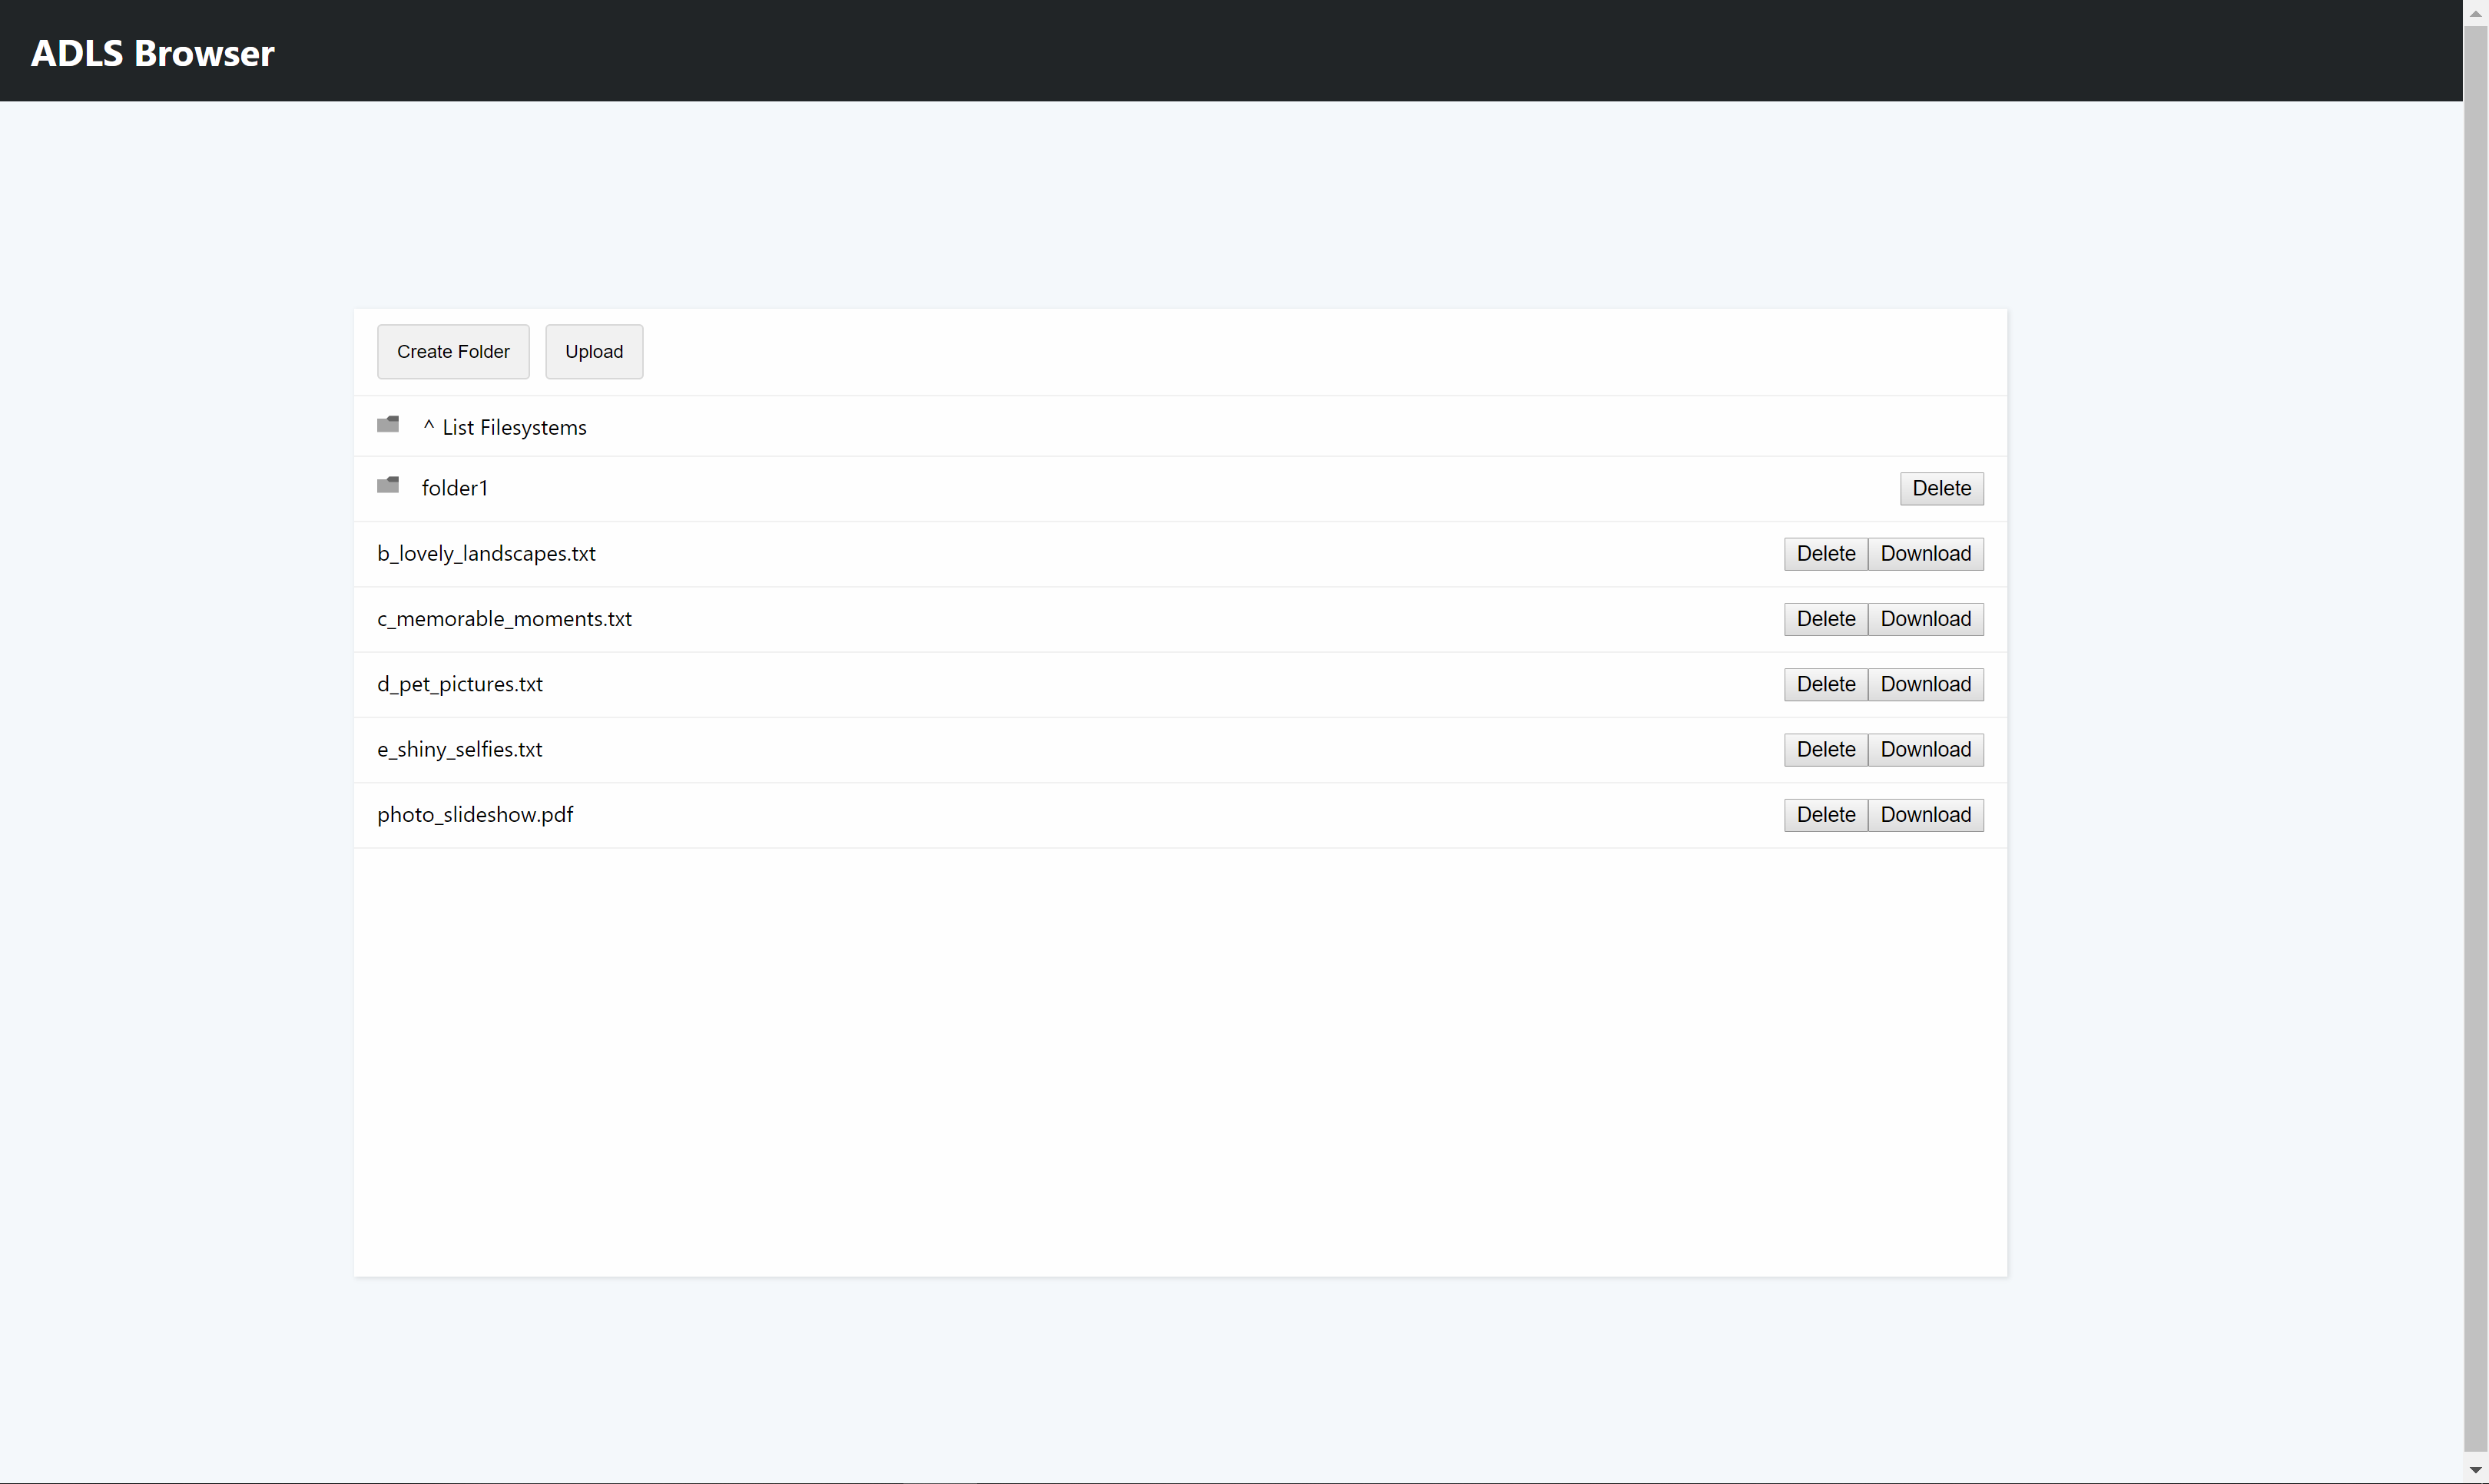
Let's go through the main points that you need to implement to be able to replicate this:
- Azure Authentication
- Azure Data Lake Gen 2 API
Note: In case you are interested in the full source code, feel free to grab it at: https://github.com/Xaviergeerinck/PublicProjects/tree/master/JS/Azure/Storage/ADLS2/Browser
1. Azure Authentication
When authenticating a user we want to keep a few things in mind when it comes to allowing them to access files/folders on our company-wide data lake:
- Lock them to a certain directory
- Allow them to only see files/folders they have access to
- Secure our application in such a way that no credential leak is possible
To solve this, we can utilize something that is called an "Implicit Grant Flow" that is utilized in frontend applications without a backend and allows us to call Azure APIs once authenticated through the token returned.
Implementing this in a React.js Application is a bit harder when you utilize server side rendering, but when purely using it as a SPA application we are able to utilize the create-react-app command and install react-adal.
Our index.js will then utilize react-adal in this way which allows us to now load our react app and be signed in instantly.
import React from 'react';
import ReactDOM from 'react-dom';
import { runWithAdal } from 'react-adal';
import App from './App';

const DO_NOT_LOGIN = false;

runWithAdal(authContext, () => {
    ReactDOM.render(<App />, document.getElementById('root'));
}, DO_NOT_LOGIN);
We can now use the Bearer token provided to authenticate against our API.
2. Azure Data Lake Gen 2 API
2.1. General API Call
To implement access to our Data Lake, we are able to utilize the excellent REST API as documented at https://docs.microsoft.com/en-us/rest/api/storageservices/data-lake-storage-gen2.
For a generic call for example, we can write code that will create a folder by calling the endpoint http://{accountName}.{dnsSuffix}/{filesystem}/{path}?resource=directory with a PUT method. This we can implement by calling the fetch method with the correct parameters.
By utilizing the adalApiFetch method provided in the react-adal config file as described in its installation documents, we can automatically inject the Bearer token in the Authorization header.
export const fileSystemFolderCreate = async (fileSystemName, folderPath, folderName) => {
    if (!folderName || folderName == "") {
        return;
    }

    // Create the folder on the ADLS and reload the current path
    // PUT http://{accountName}.{dnsSuffix}/{filesystem}/{path}?resource={resource}&continuation={continuation}&mode={mode}&timeout={timeout}
    // https://docs.microsoft.com/en-us/rest/api/storageservices/datalakestoragegen2/path/create
    const res = await adalApiFetch(fetch, ''
        + `https://${Config.storageAccountName}.dfs.core.windows.net`
        + `/${fileSystemName}`
        + `${folderPath}/${folderName}?resource=directory`,
        {
            method: 'PUT'
        }
    );

    // StatusCode 201 should be returned - 201 Created
    if (res.status != 201) {
        alert("Something happened while creating the folder");
        return false;
    }

    return true;
}
2.2. Create File & Split in Chunks
Things however get more interesting when you want to create a file. Azure Data Lake implements this through 3 different calls:
- Create File
- Append Content
- Flush file to disk
Which makes it that we will have to implement those 3 calls after each other (which is luckily more easier to do through promises). Another problem that arises though is that we will have to chunk up our files! So that we can upload files with a unlimited size due to the upload limitations in a POST / PUT method. Now due to promises this can all be simplified to the following:
export const fileSystemFileUpload = async (fileSystemName, filePath, fileName, fileBlob, cbUploadProgress) => {
    const BYTES_PER_CHUNK = 1048576 * 1; // 5Mb

    // 1. Create File Placeholder
    const res = await adalApiFetch(fetch, ''
        + `https://${Config.storageAccountName}.dfs.core.windows.net`
        + `/${fileSystemName}`
        + `${filePath}/${fileName}?resource=file`,
        {
            method: 'PUT'
        }
    );

    // 2. Append Content
    let chunkCount = Math.max(Math.ceil(fileBlob.size / BYTES_PER_CHUNK), 1);

    console.log(`Sending ${chunkCount} chunks`);

    for (let i = 0; i < fileBlob.size; i += BYTES_PER_CHUNK) {
        console.log(`Sending ${i}/${fileBlob.size}`);
        let chunkBlob = fileBlob.slice(i, i + BYTES_PER_CHUNK);

        // Callback for progress
        cbUploadProgress(fileBlob.size, i);

        // Upload the different chinks
        console.log(chunkBlob.size);
        const resAppend = await adalApiFetch(fetch, ''
            + `https://${Config.storageAccountName}.dfs.core.windows.net`
            + `/${fileSystemName}`
            + `${filePath}/${fileName}?action=append&position=${i}`,
            {
                method: 'PUT',
                headers: {
                    'Content-Type': 'application/octet-stream',
                    'Content-Length': chunkBlob.size,
                    'X-HTTP-Method-Override': 'PATCH' // Currently send it as a PUT since PATCH is not supported
                },
                body: chunkBlob
            }
        );
    }

    // 3. Flush the file
    const resFlush = await adalApiFetch(fetch, ''
        + `https://${Config.storageAccountName}.dfs.core.windows.net`
        + `/${fileSystemName}`
        + `${filePath}/${fileName}?action=flush&position=${fileBlob.size}`,
        {
            method: 'PUT',
            headers: {
                'Content-Type': 'application/octet-stream',
                'X-HTTP-Method-Override': 'PATCH' // Currently send it as a PUT since PATCH is not supported
            }
        }
    );

    // Callback for progress stating that we are done
    cbUploadProgress(fileBlob.size, fileBlob.size);
}


Comments ()