
Enabling Linux on Mac M1 with Asahi Linux and installing Docker!
Learn how you can get Linux running on your Mac M1 processor!

Mac M1 Minis are great! They simply provide amazing - if not the best - performance for price all while being in a slim form factor!
At work we use Edge devices commonly for all purposes (even AI at edge). The main difficulty however is that these devices are sometimes not powerful enough, overheat or they are simply too expensive. Below I made a simple overview of price / GFLOPS ratio
| Machine | TDP | TFLOPS (FP32) | Price (Eur) | Price/GFLOPS |
|---|---|---|---|---|
| Nvidia Xavier | 30 W | 1.4 | 500 | 2.8 |
| Mac M1 | ~28W* | 2.6 | 800 | 3.25 |
| Nvidia Orin | 40 W | 5.3 | 2000 | 2.65 |
* TDP is difficult to assess since it combines GPU and CPU and has not officially been released but it should be in this range https://www.anandtech.com/show/16252/mac-mini-apple-m1-tested/5
Seeing the interesting price point and the not-locked ecosystem, we decided to give it a try and create a cluster with them. So let's go more in-depth on how we did this 😎
Installing Linux
First of the bat is to install Linux on the machines! While Mac OS is amazing, it's not so much for server usage as it 1) includes a GUI and 2) just doesn't work with a lot of tooling we typically would use. Which is why we are going to reflash these devices to run Linux.
Luckily for us, Asahi Linux has been created, aiming to bring Linux support to the Mac M1 (including the GPU drivers!). It's still a work in process, but they already have a good support for the CPU part with the GPU one being in development (currently supporting OpenGL 2.1 but working towards full Vulkan and OpenGL 3.0 support)


To install Asahi, we can simply refer to the blog article as it makes no sense to write everything from scratch ourselves.
https://www.maketecheasier.com/install-asahi-linux-on-m1-mac/
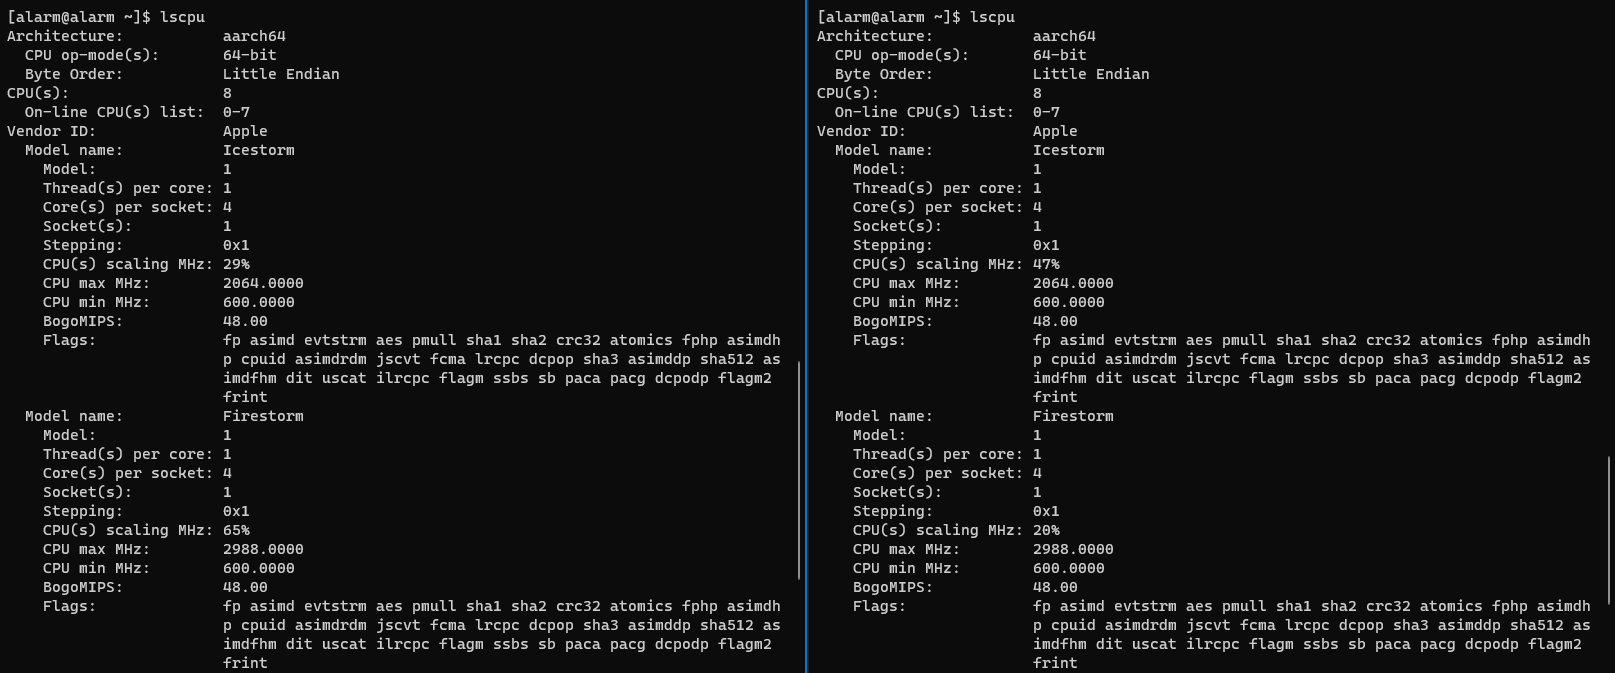
Once the steps are followed we can print out the CPU information:
Enabling SSH and setting a Hostname
Finally, we enable ssh so that we can in remotely and set a hostname to find our node back.
su root

systemctl enable sshd
systemctl restart sshd

hostnamectl set-hostname mac-node-1
Creating a new User
By default, Asahi installs with "alarm" as the user and "root" but let's create a new user named mac:
su root

# Update our packages
pacman -Sy

# Install sudo package
pacman -S sudo

# Add a user named mac
useradd -m mac
passwd mac
Now add the user mac to the /etc/sudoers file with visudo:
##
## User privilege specification
##
root ALL=(ALL:ALL) ALL
mac ALL=(ALL:ALL) ALL
And switch to our mac user with su mac
Installing Docker
Now let's install the docker environment:
# Install Docker
pacman -S docker
systemctl enable docker

# Enabling rootless usage
sudo usermod -a -G docker mac
And we should be able to execute sudo docker ps!
CONTAINER ID IMAGE COMMAND CREATED STATUS PORTS NAMESTo test this out, let's install a simple hello world container
sudo docker run --rm hello-worldWhich will print
[mac@alarm alarm]$ sudo docker run --rm hello-world
Unable to find image 'hello-world:latest' locally
latest: Pulling from library/hello-world
7050e35b49f5: Pull complete
Digest: sha256:aa0cc8055b82dc2509bed2e19b275c8f463506616377219d9642221ab53cf9fe
Status: Downloaded newer image for hello-world:latest

Hello from Docker!
This message shows that your installation appears to be working correctly.

To generate this message, Docker took the following steps:
 1. The Docker client contacted the Docker daemon.
 2. The Docker daemon pulled the "hello-world" image from the Docker Hub.
    (arm64v8)
 3. The Docker daemon created a new container from that image which runs the
    executable that produces the output you are currently reading.
 4. The Docker daemon streamed that output to the Docker client, which sent it
    to your terminal.

To try something more ambitious, you can run an Ubuntu container with:
 $ docker run -it ubuntu bash

Share images, automate workflows, and more with a free Docker ID:
 https://hub.docker.com/

For more examples and ideas, visit:
 https://docs.docker.com/get-started/
Summary
Installing Linux on Mac was a breeze! Taking just 1 hour total for both machines. Comparing this to my previous post for NVIDIA Jetsons, I must say that I prefer Mac machines.


Comments ()