
Generate AI Avatars yourself with Stable Diffusion 2.1 and Dreambooth
Learn how to generate your own unique avatars with Stable Diffusion and Dreambooth

Stable Diffusion is one of the biggest hypes lately, and it is true to its name, creating a whirlwind in the ecosystem with people creating new applications and sites that allow you to for example create your own unique avatar.
Lately, version 2 was as well released which promises quality improvements
 Bill Cusick
And was added to the diffusers package just recently
 huggingface
What is Stable Diffusion?
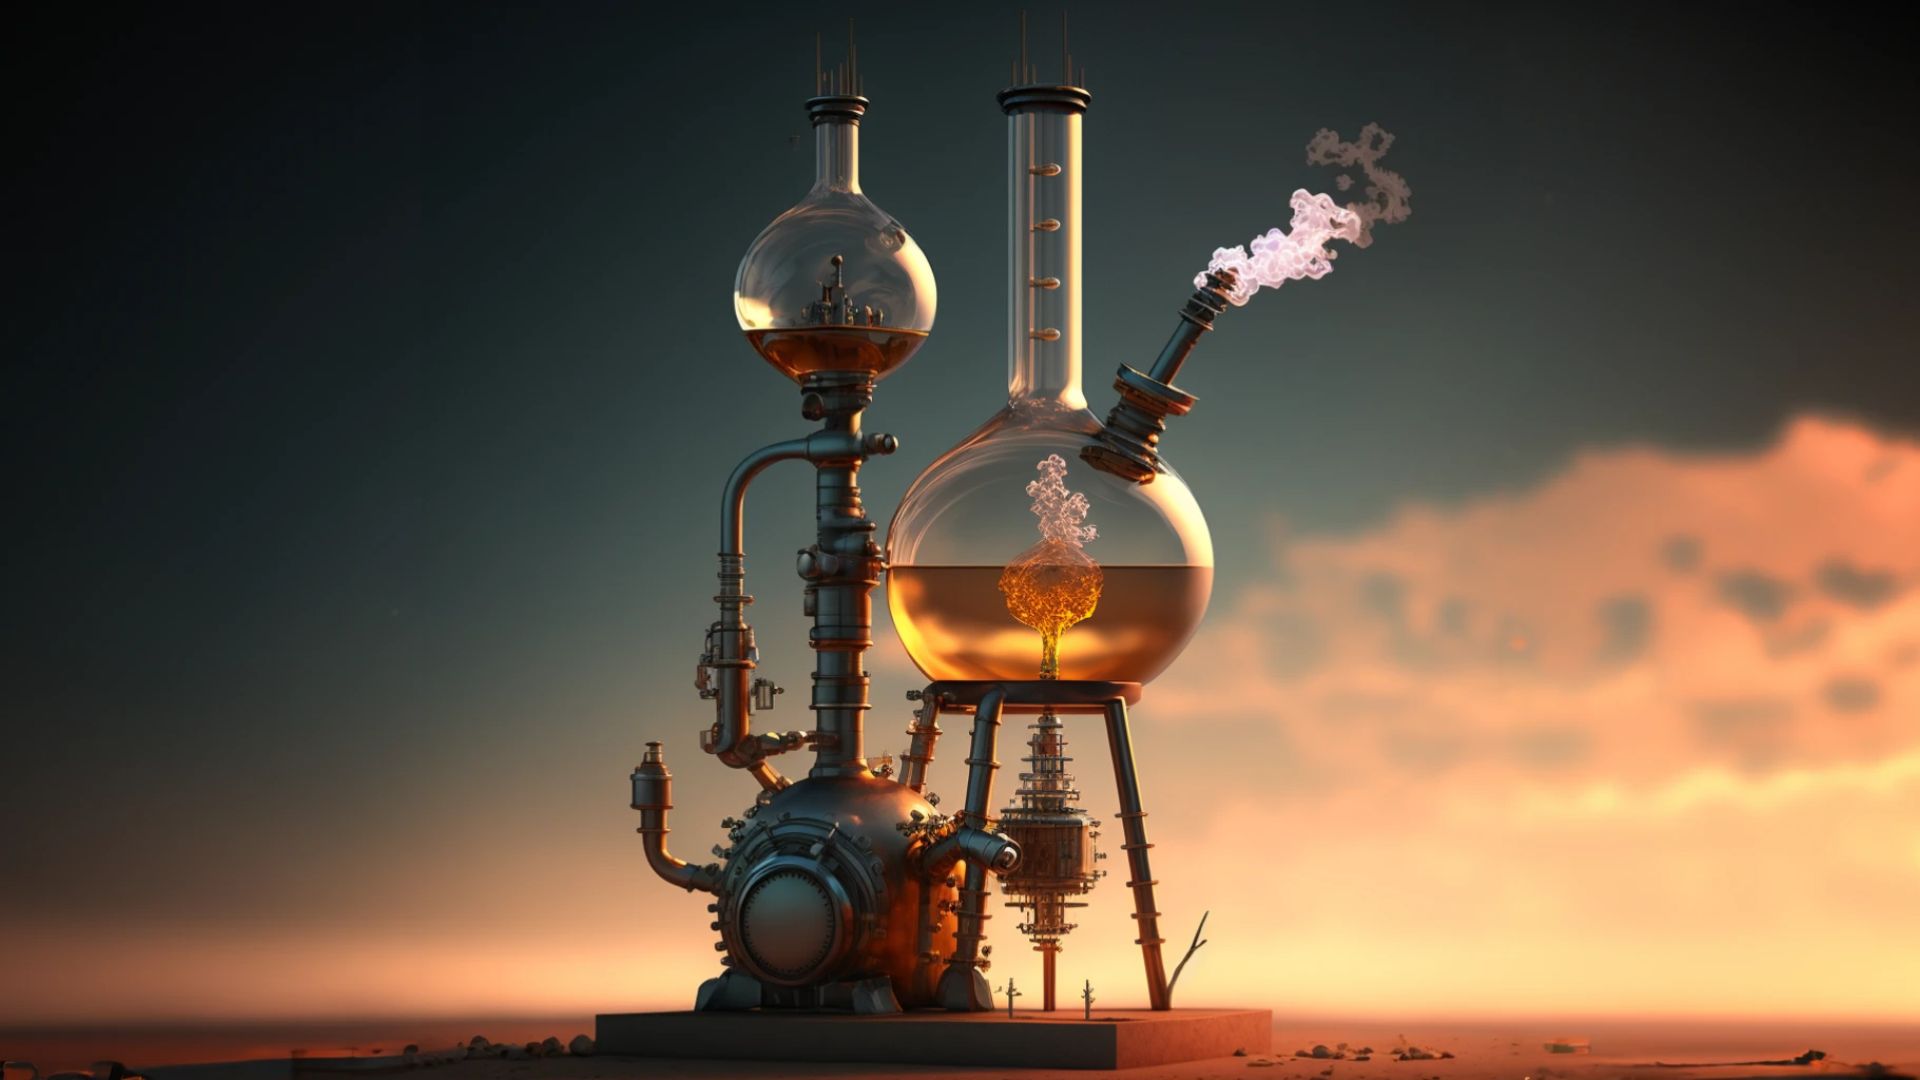
But what is stable diffusion actually? Stable diffusion comes from chemical and biological systems.
Stable diffusion is a type of diffusion that occurs when particles are evenly distributed on both sides of a membrane or barrier. This type of diffusion happens when the system is in a state of equilibrium, meaning that there is no net movement of particles across the membrane.
What is Dreambooth
Now to focus on fixating the Diffusion models towards a specific subject, the tool Dreambooth is used. Which can fine tune the model for the given subject.
So, let's get started ourselves and fine tune a diffusion model (Stable Diffusion v2) to create our own unique avatar!
HuggingFaces & Stable Diffusion / Dreambooth
Getting started with Dreambooth and Stable Diffusion is not that hard at all! Huggingfaces is simply amazing, creating detailed articles of everything they do, and producing high quality code for us to test with.
One of such articles is where they explain in more detail how you can get started with Dreambooth and how you can easily fine-tune it for better results:

When we go to the original repository of diffusers, we can find training code for Dreambooth as well as code to fine tune it ourselves.
huggingfaceDownloading the code
So, let's get started by downloading the code from the diffusers repository and setting everything ready for us to start training!
# Download and install diffusers
git clone https://github.com/huggingface/diffusers
cd diffusers
pip install -e .

# Install the dreambooth example
cd examples/dreambooth
pip install -r requirements.txt

# Initialize Accelerate
# note: run `accelerate config` if you want to pick options
accelerate config default
Note: there are quite some implementations already of the Stable Diffusion algorithm, some even improvements out of the box (e.g., @TheLastBen) but while looking at it, it had disadvantages (messy code, python 3.8 only, full dep downloading, ...) making it better to focus on our own.
Training the model on our Avatar
Building a dataset
Before we get started, we should create our own dataset of 768x768 images. This to ensure that images are cropped to our likings. For that, I utilized the service birme.net which brought the easiest user experience without having a paywall.


This should result in a dataset of around ~10 images (more is better)
Training our model (local)
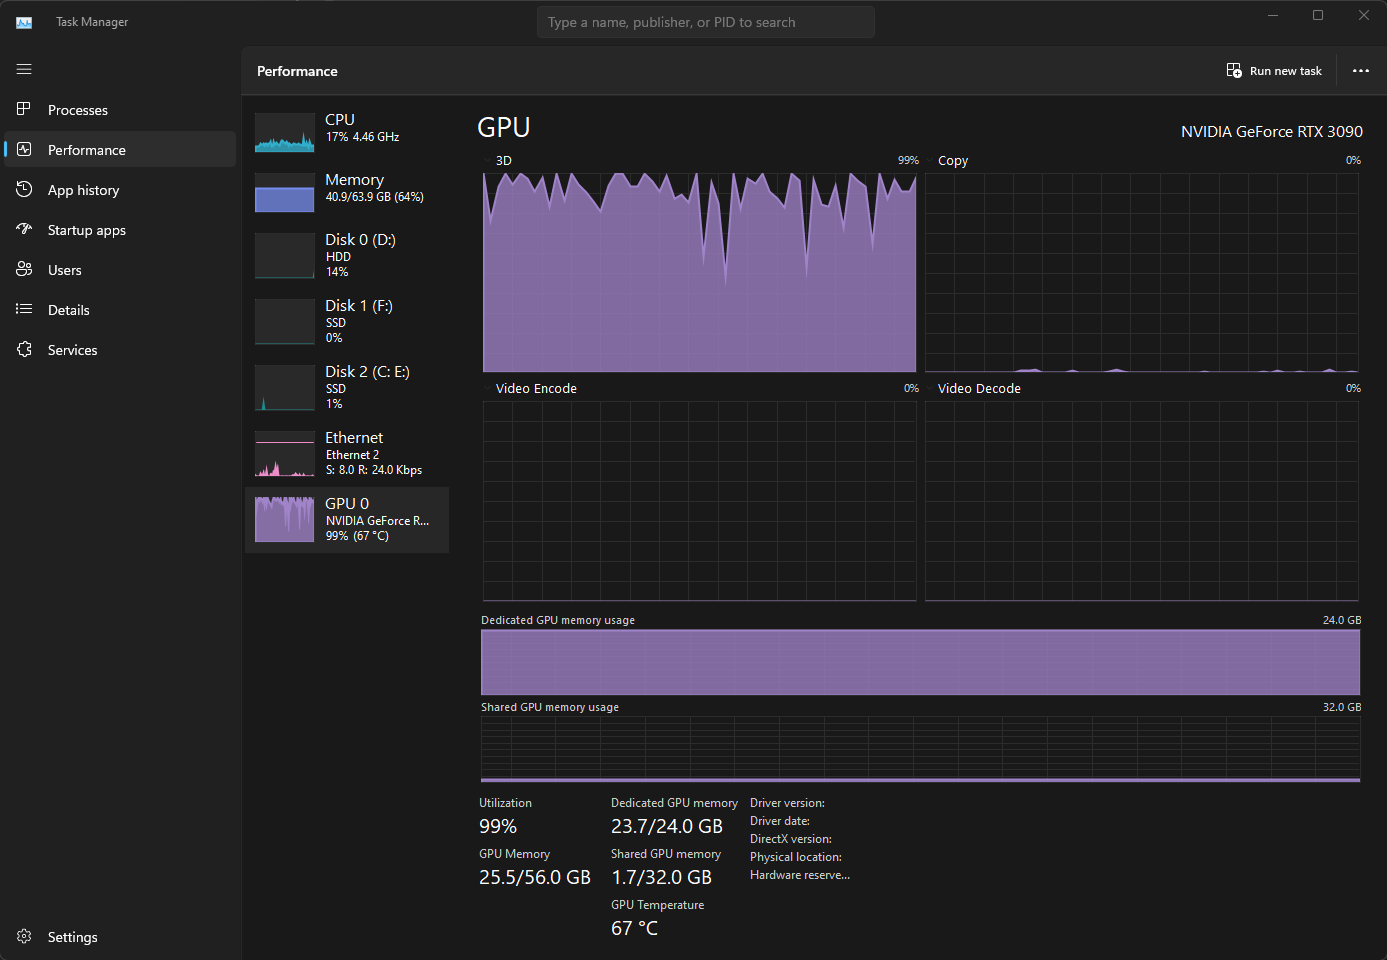
To train a model you need a GPU with a high amount of RAM. I am currently using an RTX 3090 GPU locally which provides me with 24GB of RAM in total and some shared RAM which I am not able to access since I am running this on WSL 2.
This means I am limited to training on ~500 resolution to max out my memory. If more is needed, we can optimize through the bitsandbytes package (requires some work to set it up) or just go the cloud route (see later).
So, let's start off the training process by running the below.
Note: we are not usingsksas often seen, since it refers to a rifle, instead we usemyselfiepictureas dreambooth can use any instance as a subject
export MODEL_NAME="stabilityai/stable-diffusion-2"
export INSTANCE_DIR="../../../dataset/xavier/512"
export OUTPUT_DIR="../../../model/xavier"

cd diffusers/examples/dreambooth

# instance_prompt: description of what the object or style is with the initializer word sksperson
# we are tuning to batch size 2, learning rate 1e-6 and 1200 steps as recommended by hugging faces to train on faces
# we are using
accelerate launch train_dreambooth.py \
  --pretrained_model_name_or_path=$MODEL_NAME  \
  --instance_data_dir=$INSTANCE_DIR \
  --output_dir=$OUTPUT_DIR \
  --instance_prompt="a photo of myselfiepicture" \
  --resolution=512 \
  --train_batch_size=2 \
  --gradient_accumulation_steps=1 \
  --learning_rate=1e-6 \
  --lr_scheduler="constant" \
  --lr_warmup_steps=0 \
  --max_train_steps=1200
Seeing it's cold these days in Belgium, we can now see the GPU heating up and perform some work!
If you prefer the cool route, read down below on how to perform training in Azure
Training our model (Azure)
Even better is to train our model on a Cloud Compute who offers higher GPUs (and faster ones too!) for just a few $ we can get started.
To keep things simple here, we won't be doing anything fancy and will just be using the compute instances directly instead of automating things.
On Azure, let's first create a Machine Learning Workspace
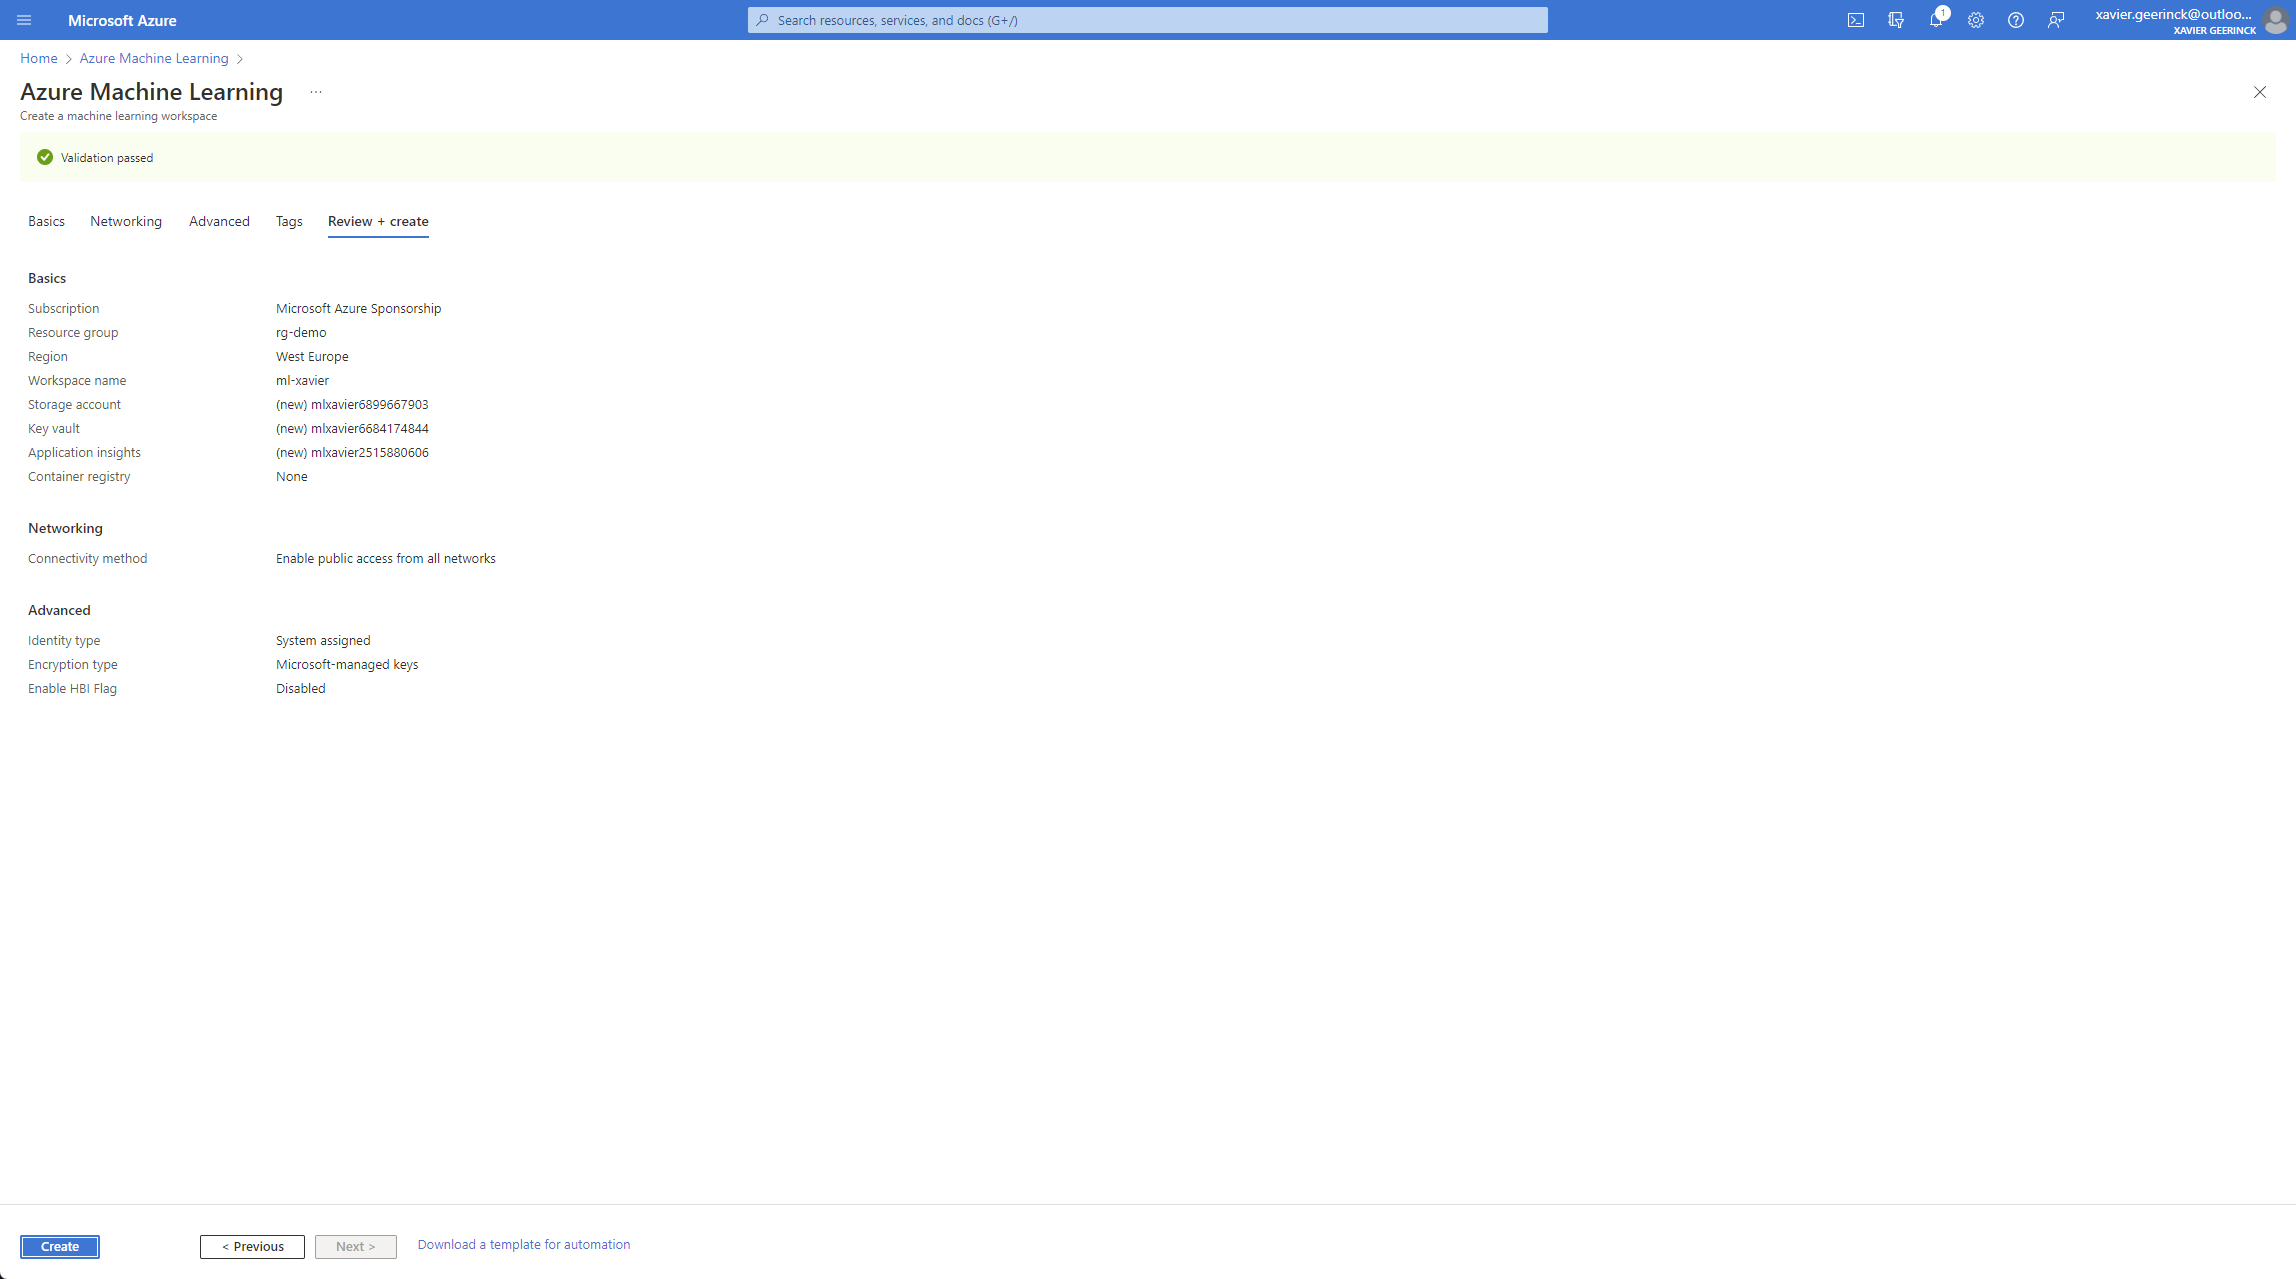
Once we have created it, open the resource and go to the studio interface
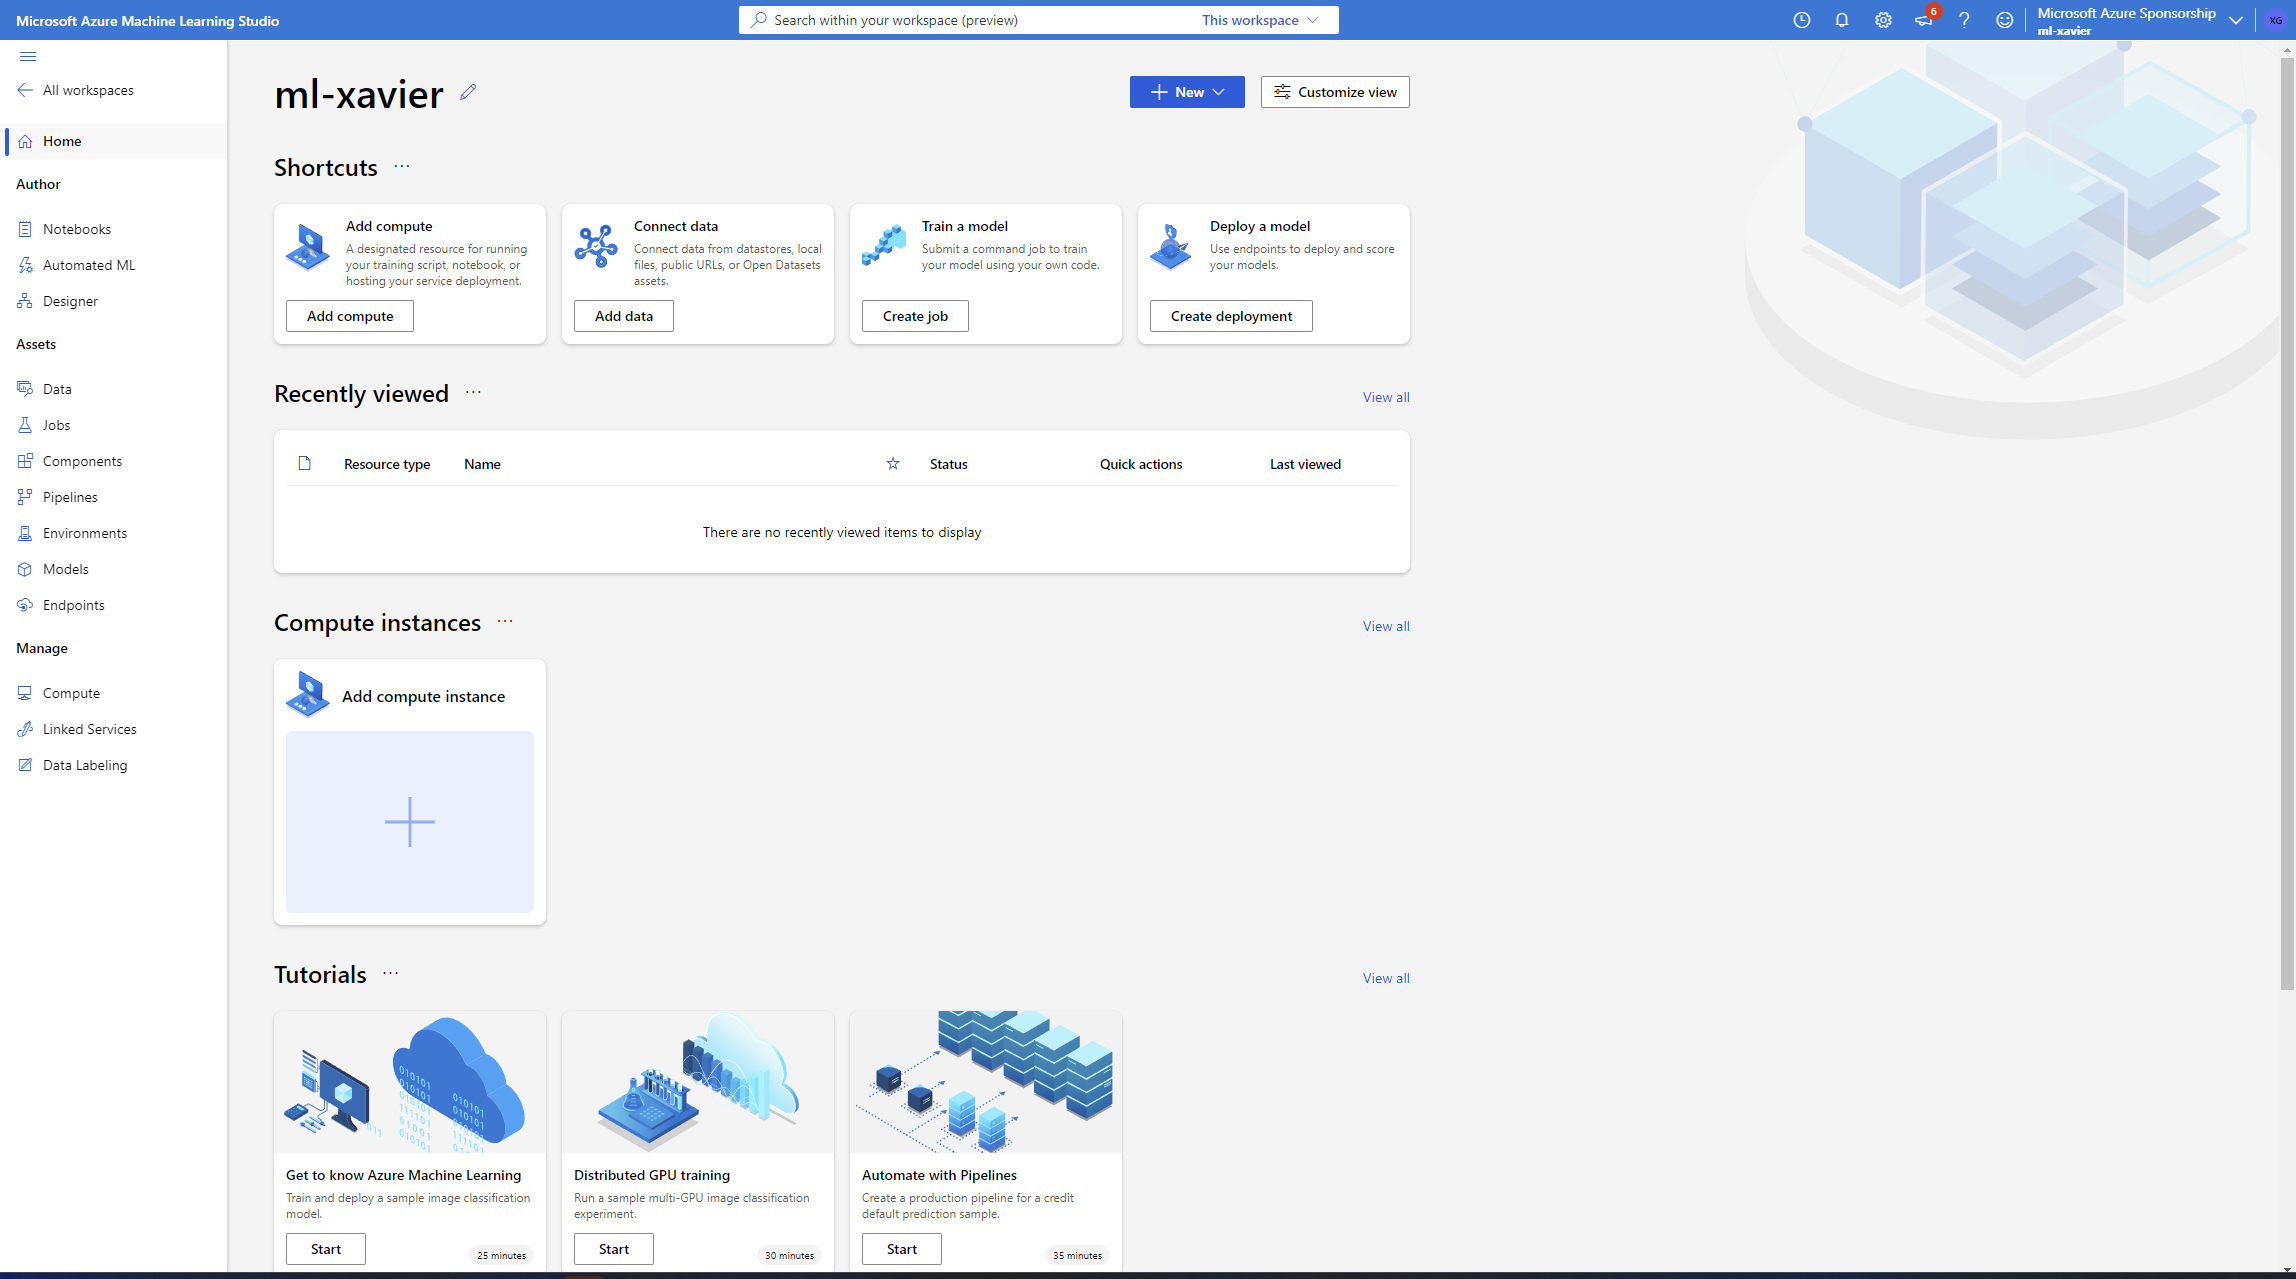
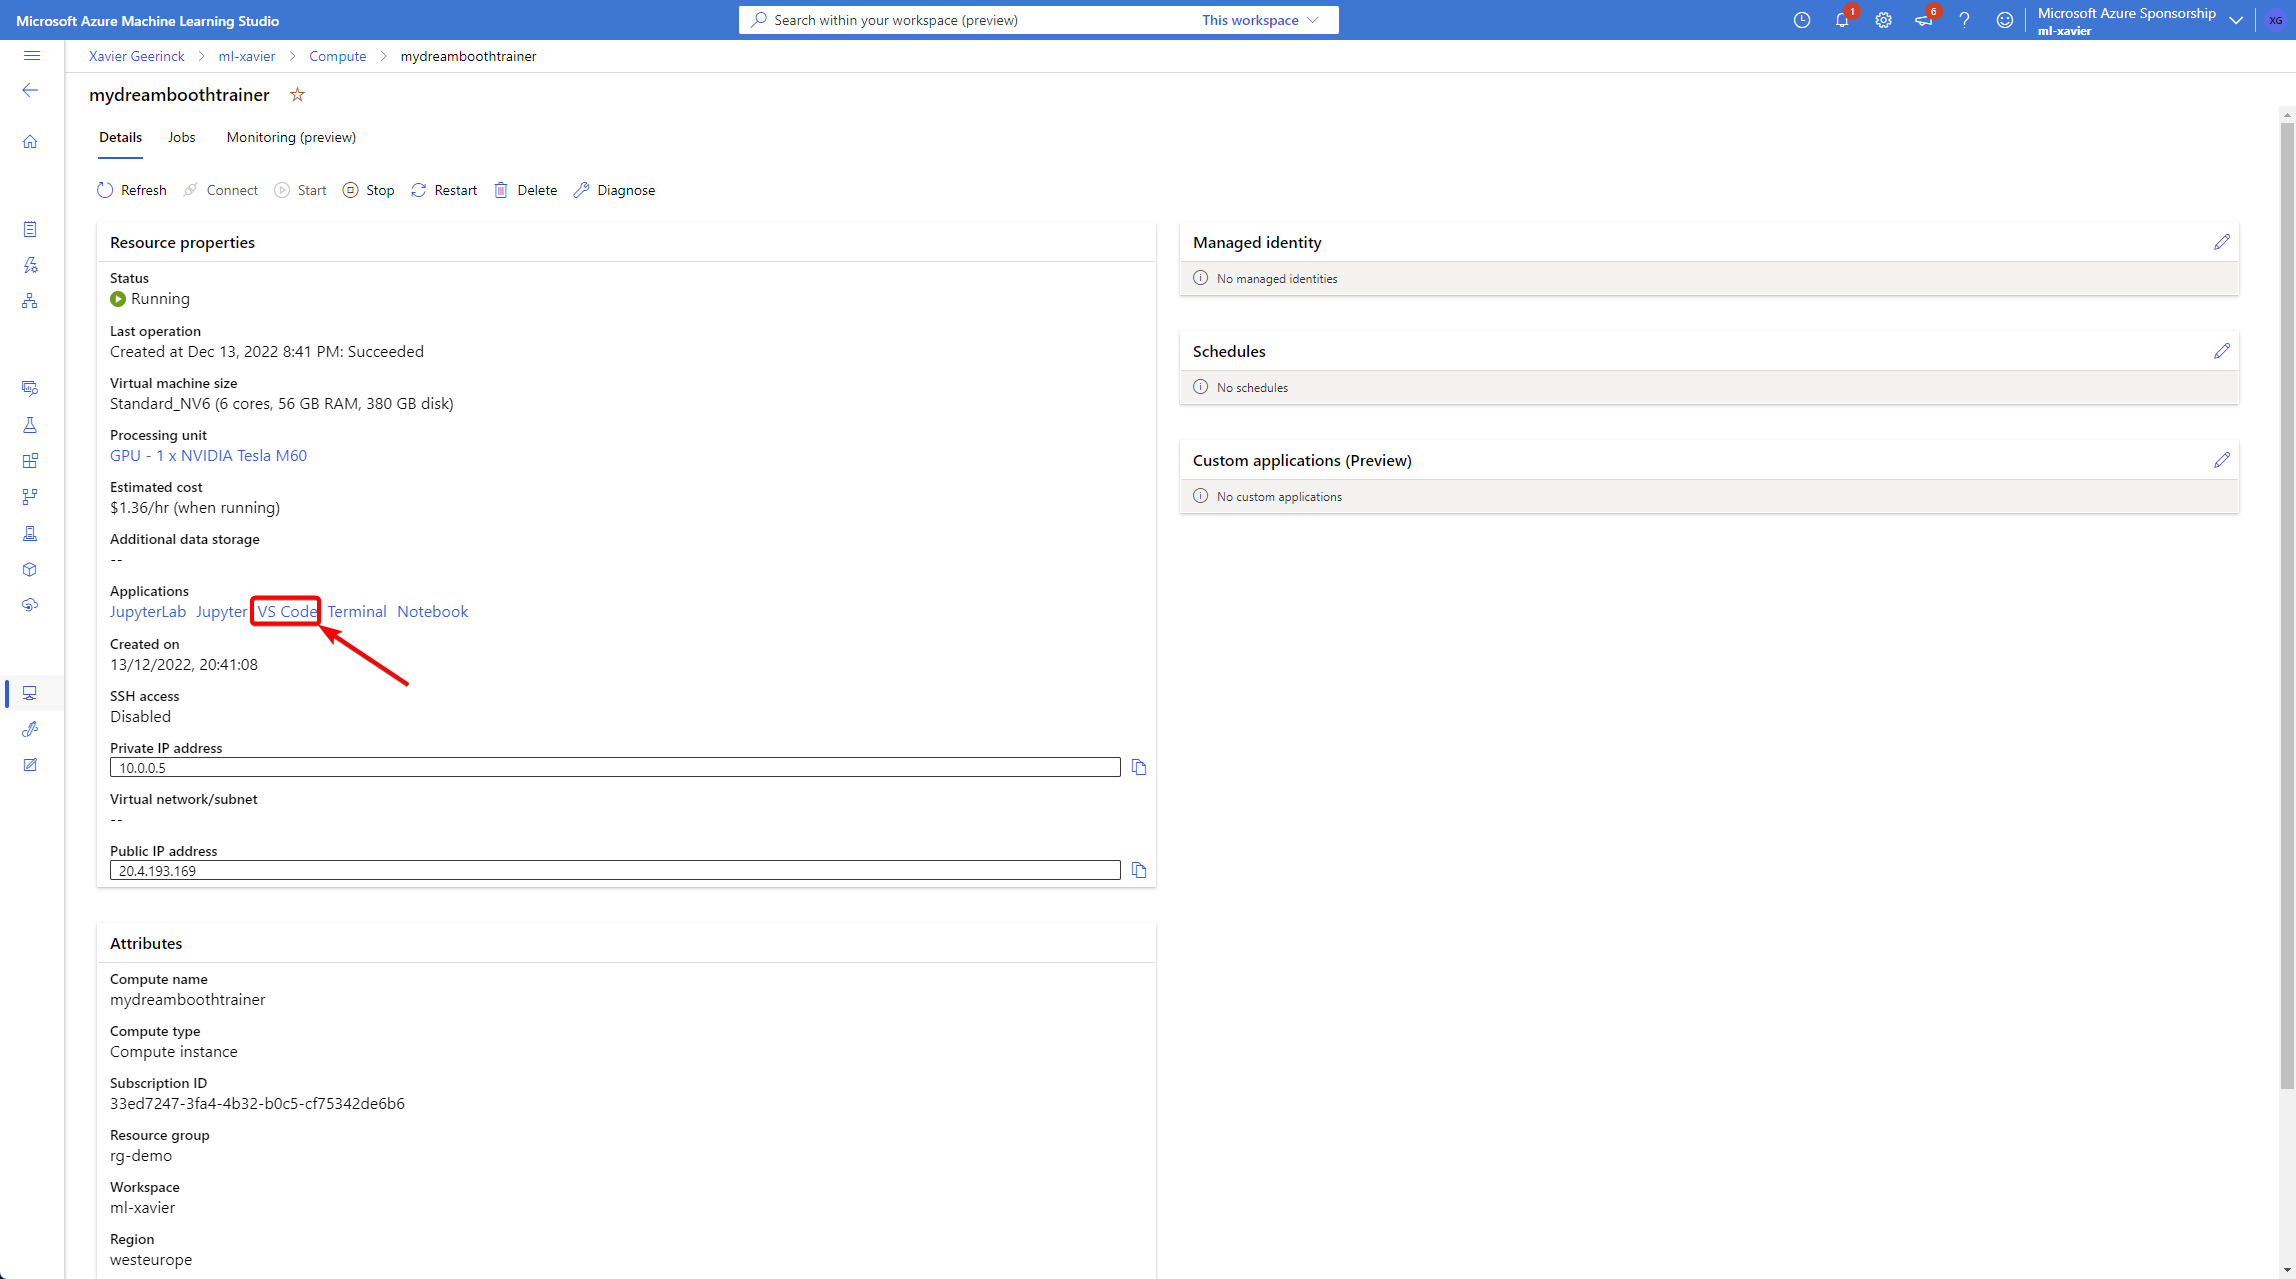
In here, click on "Add Compute" and select a Compute Instance
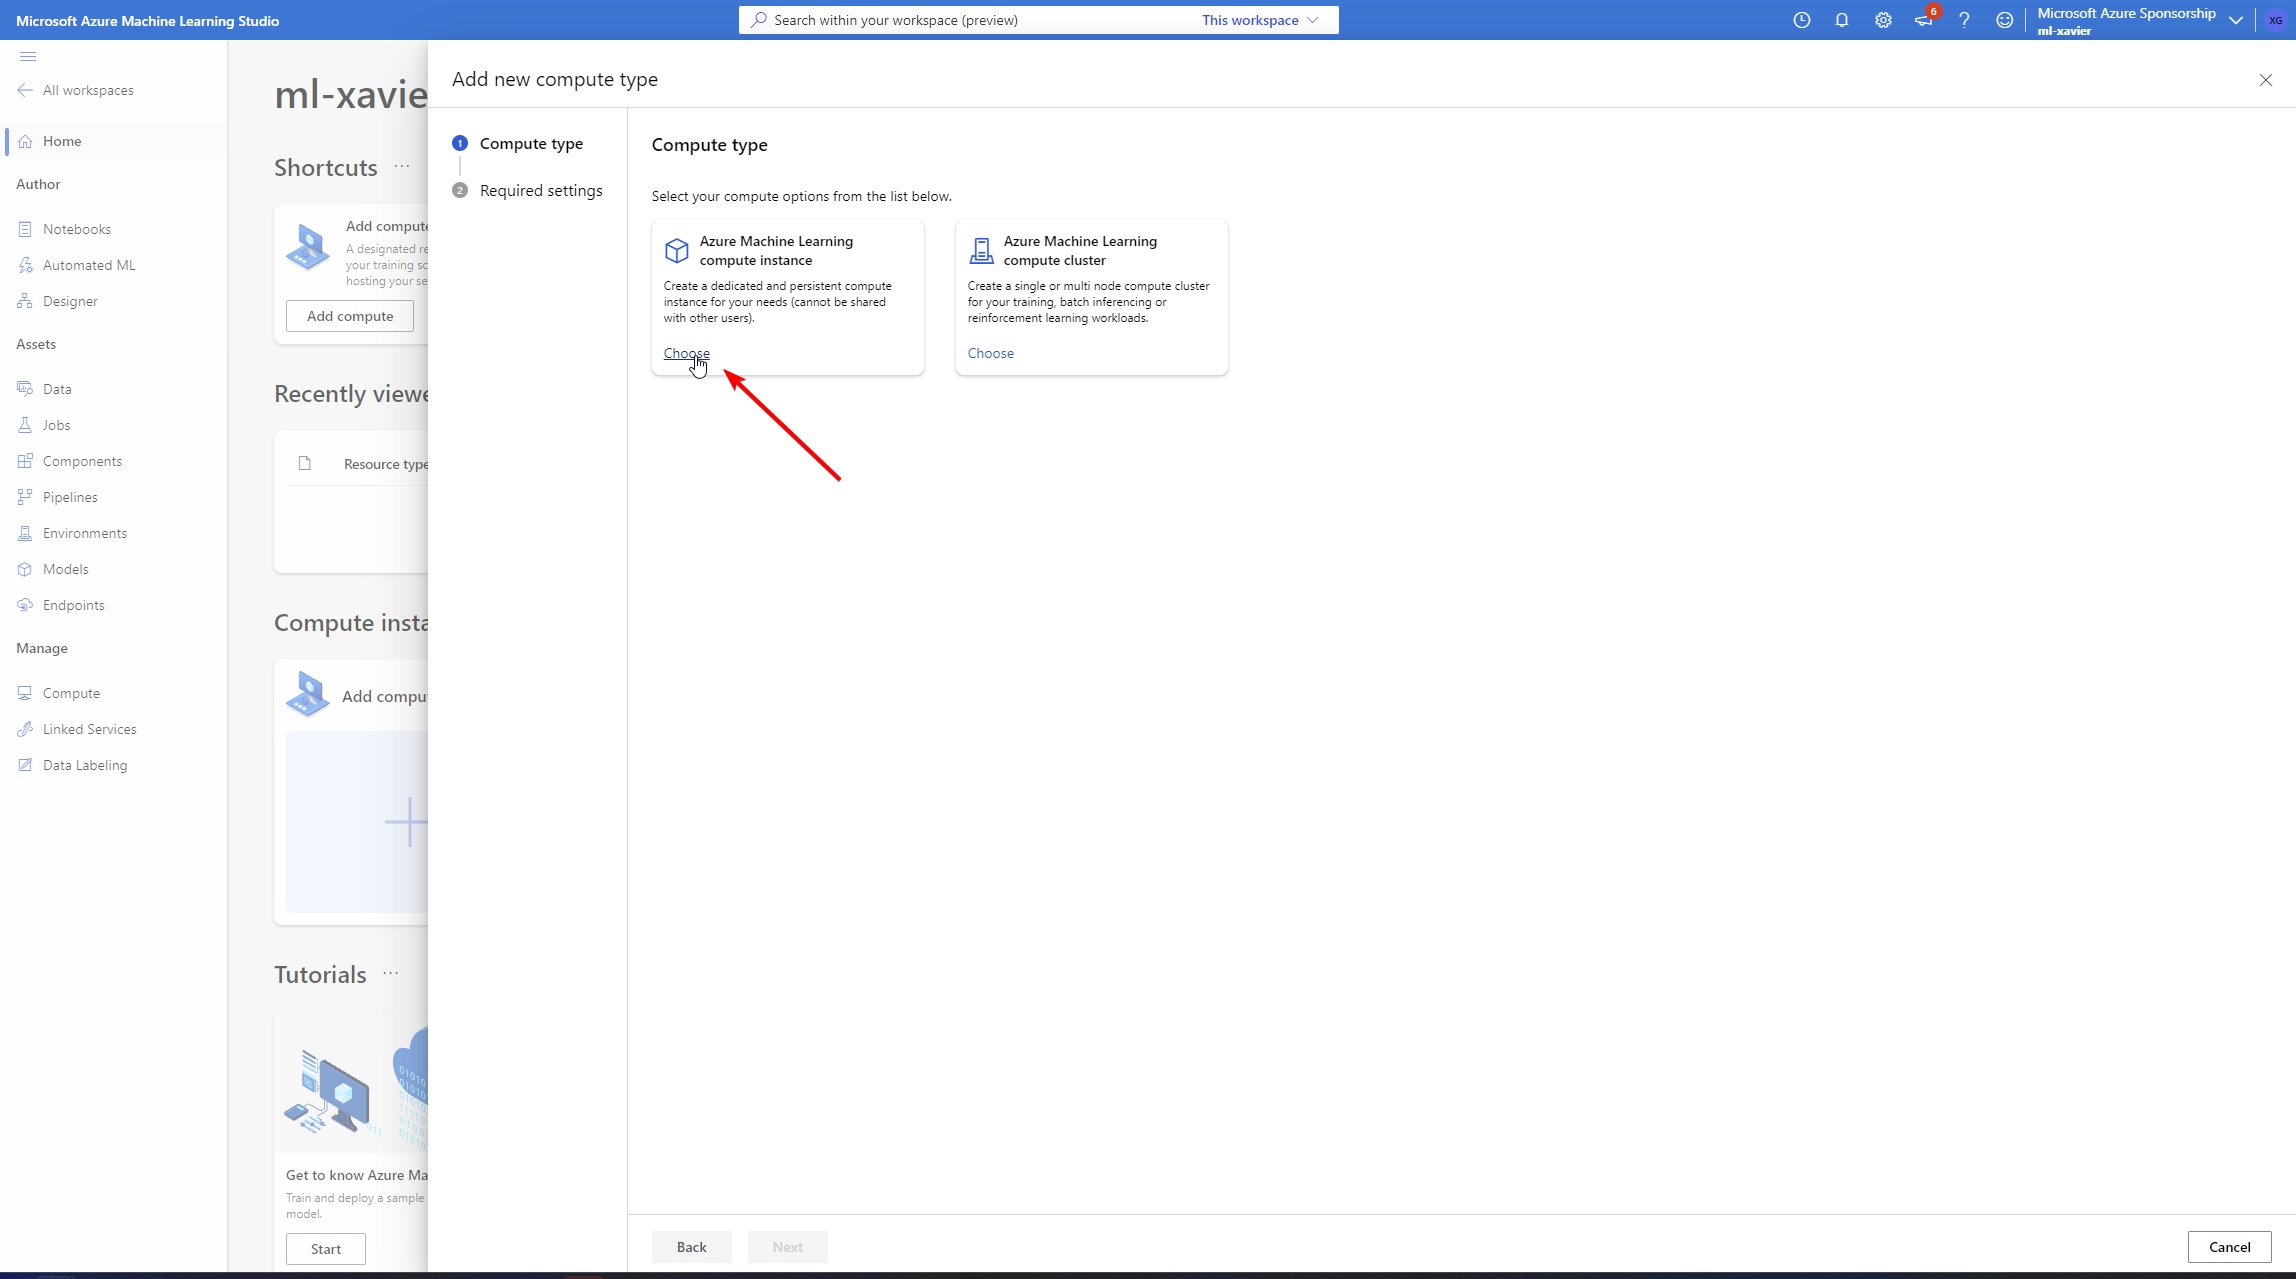
Finally, select your instance type with enough VRAM and create it
Note: As you can see, we only have <= 12 GB options! So we will require to configure DeepSpeed which we can do in the accelerate config step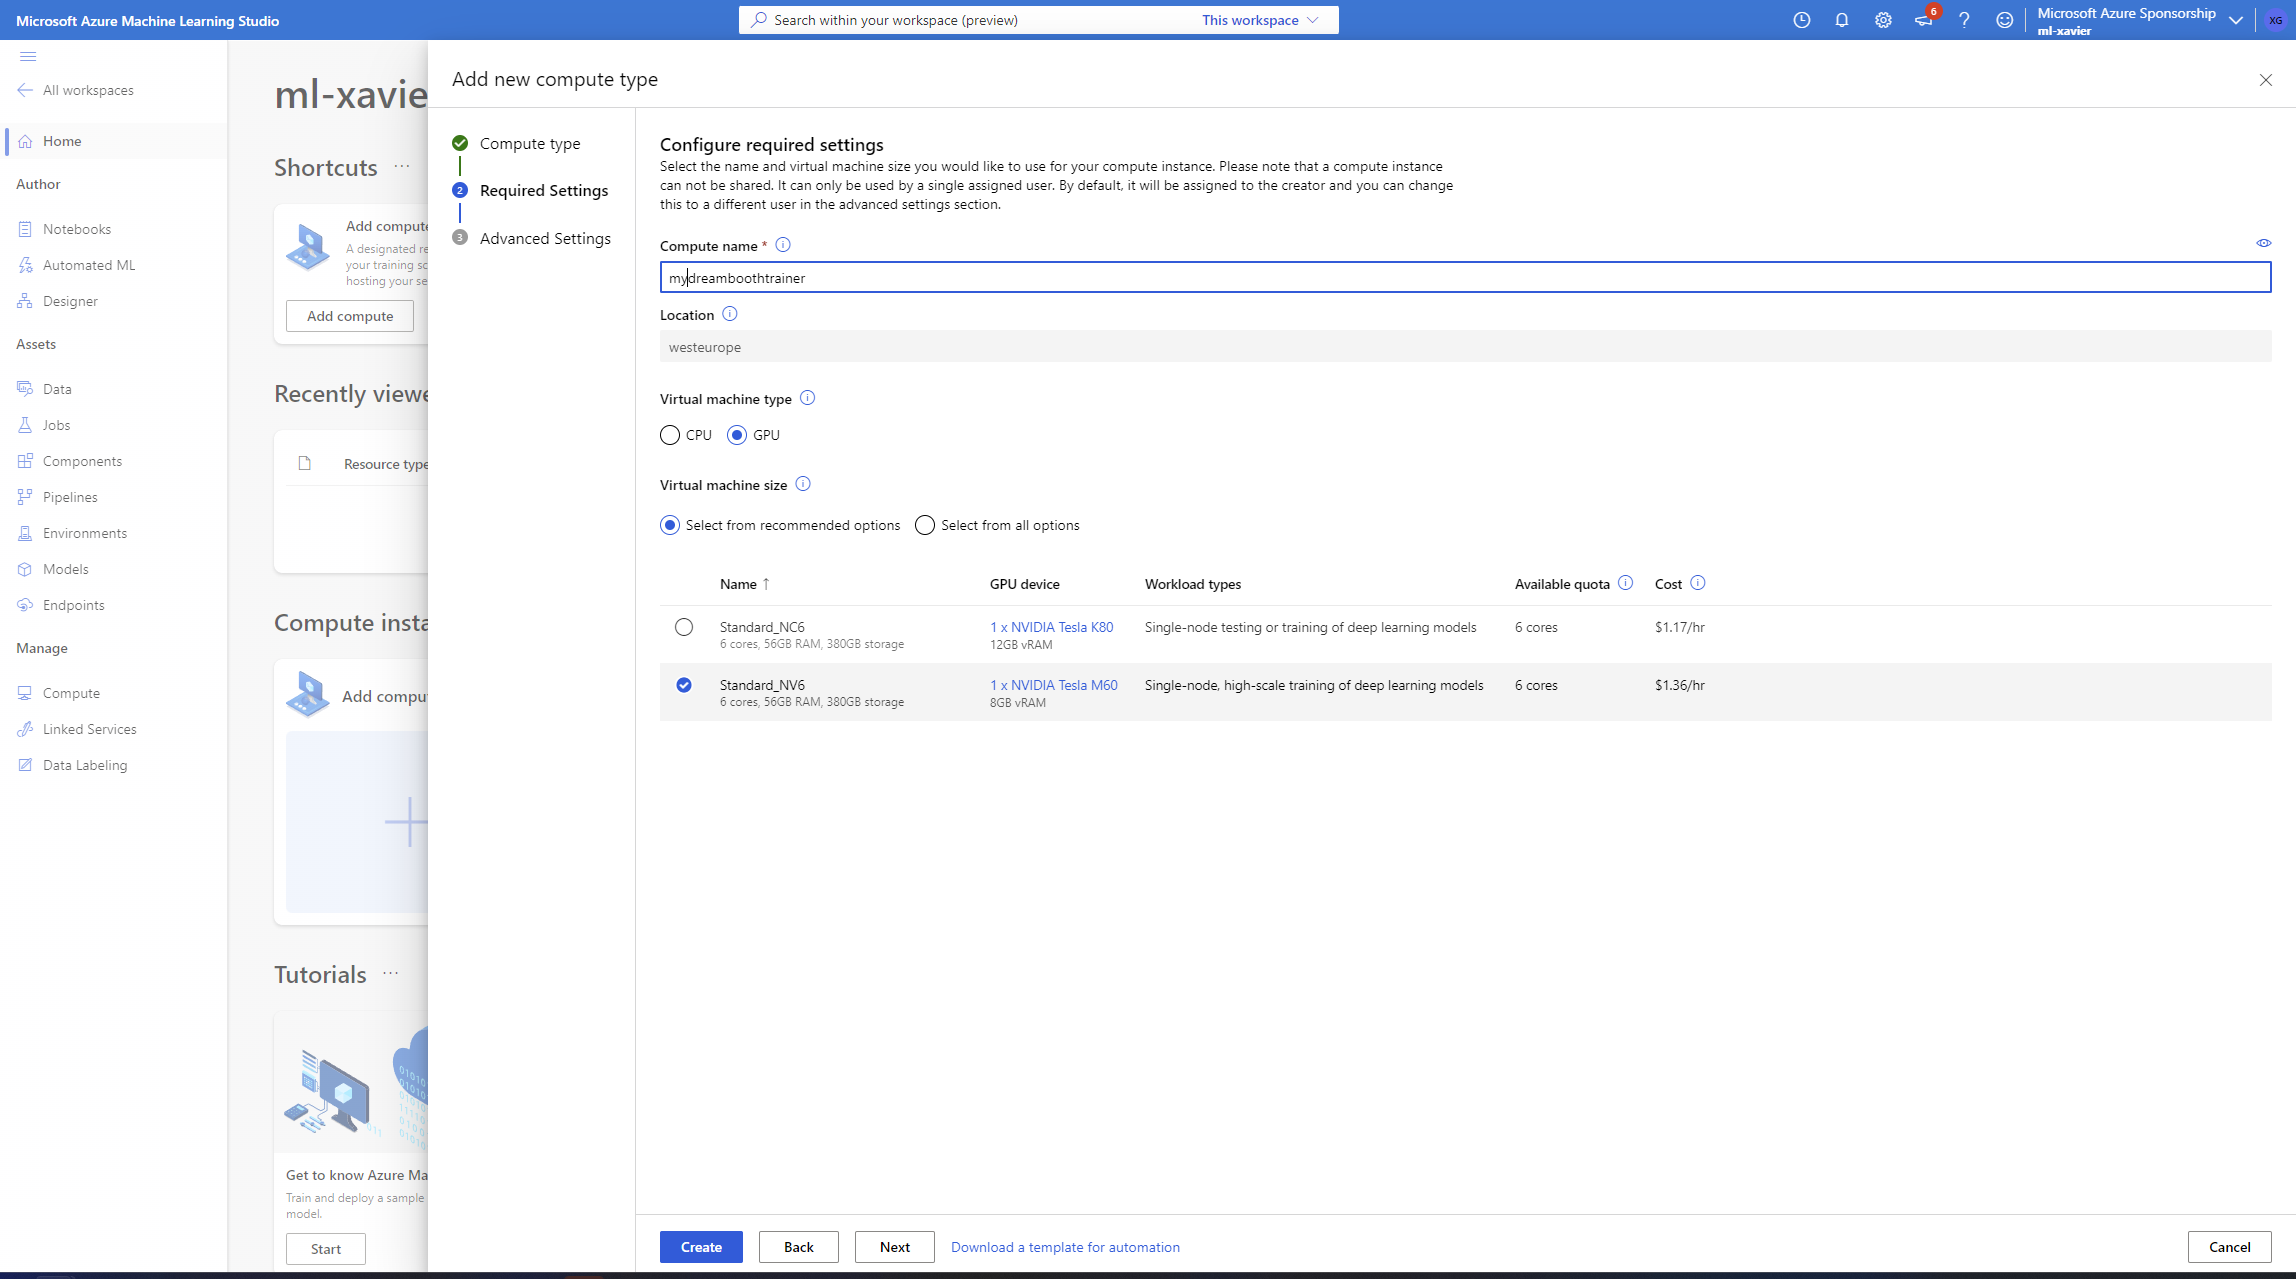
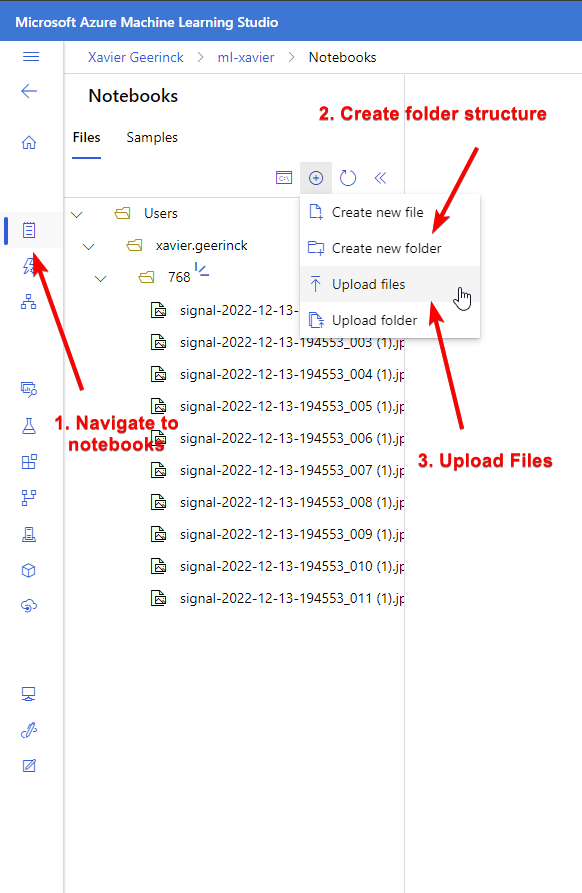
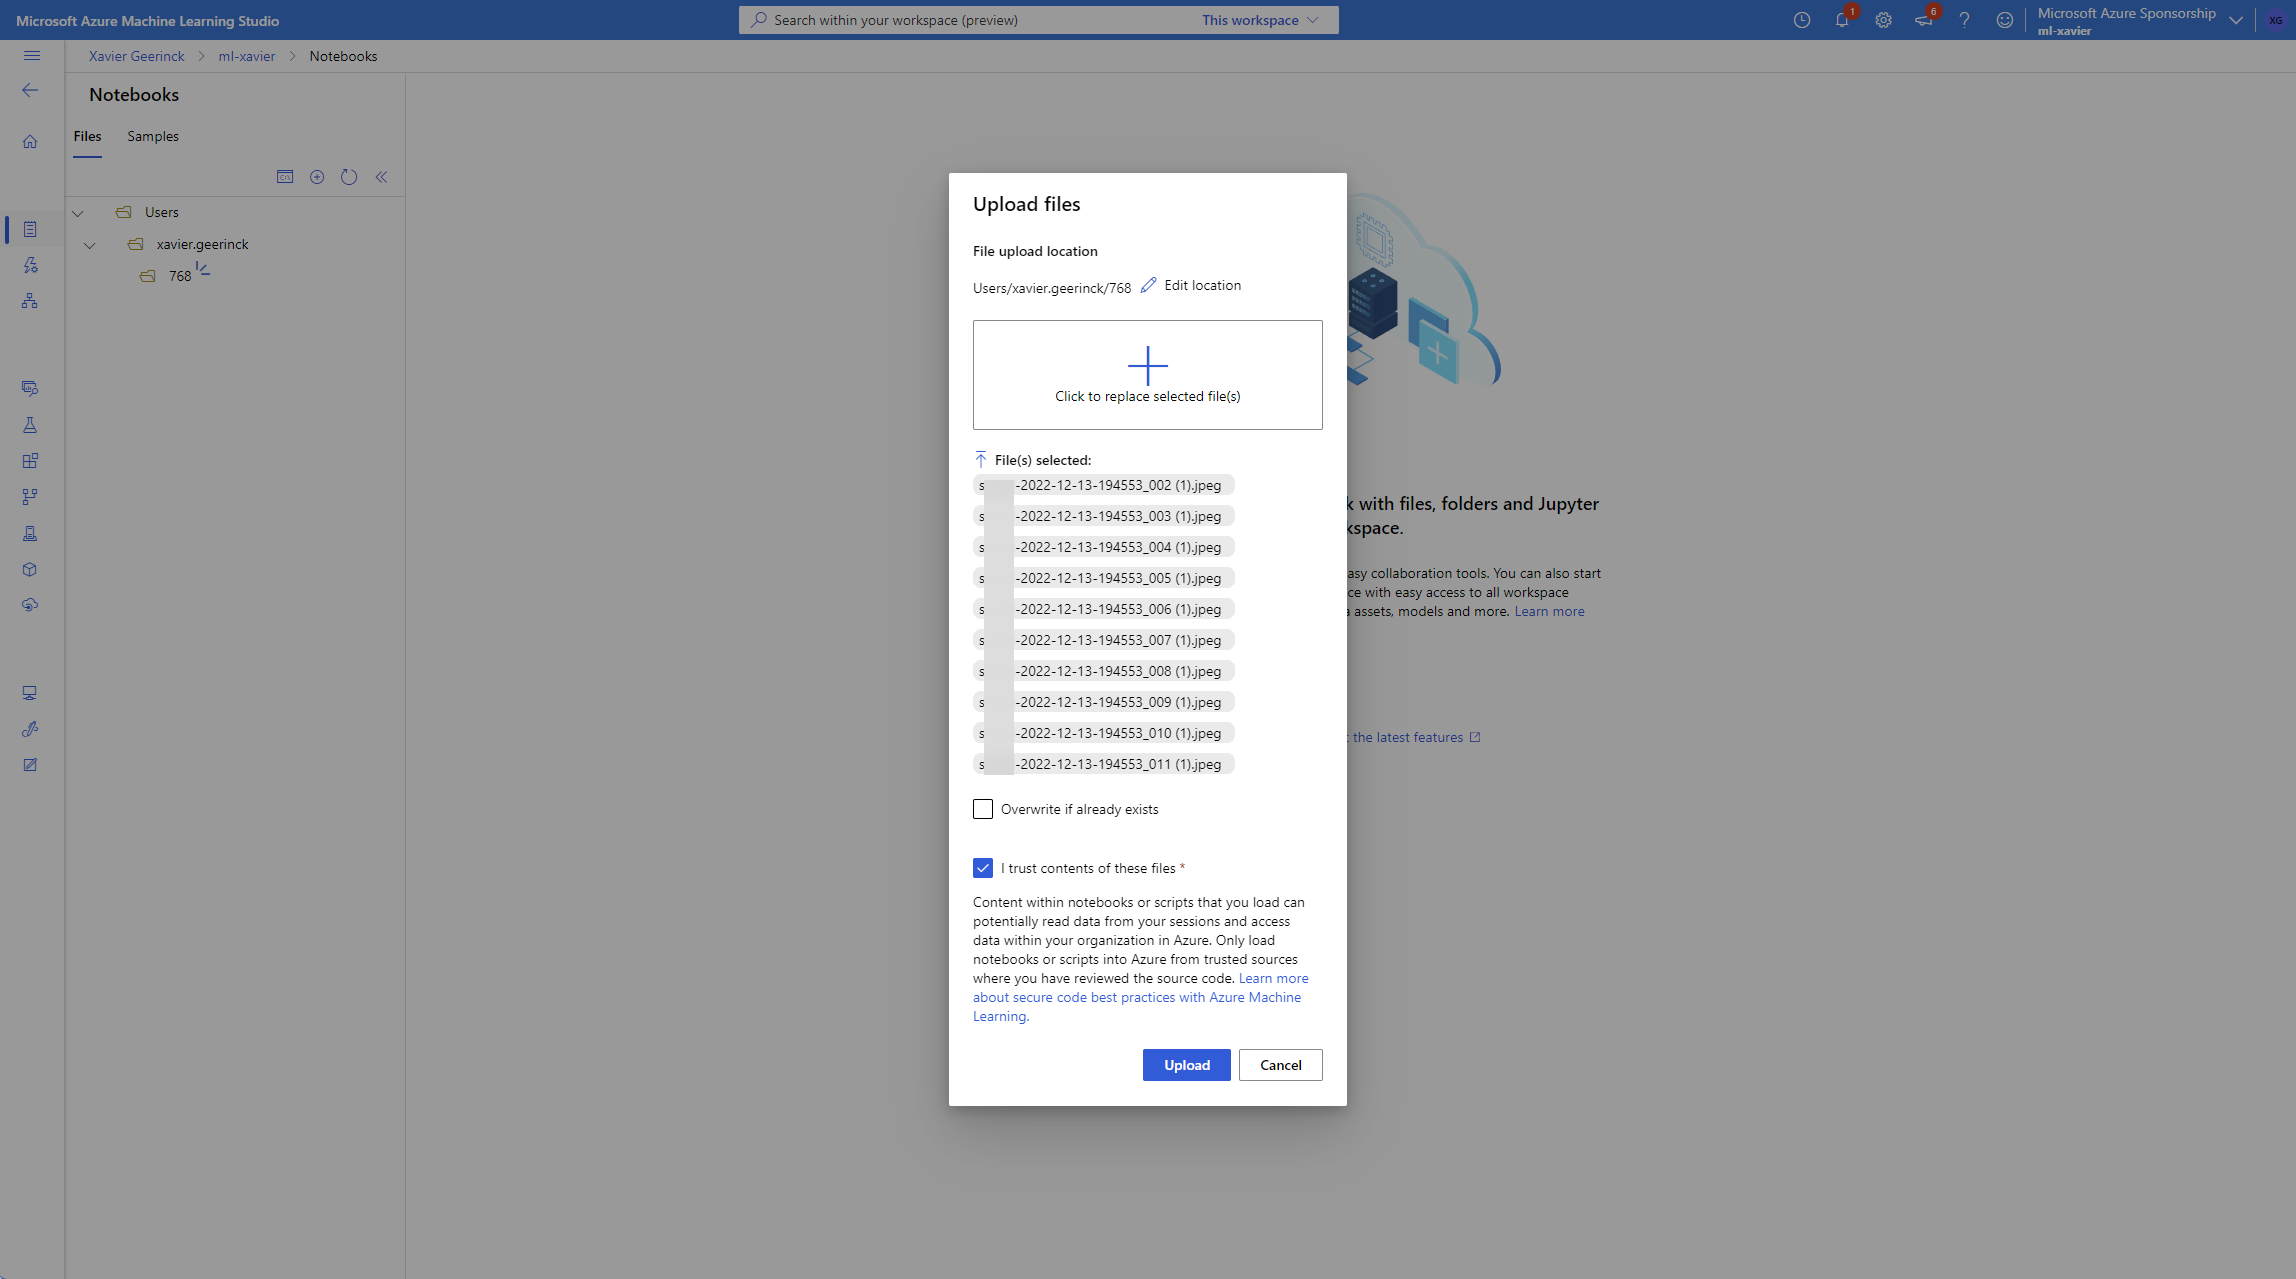
Meanwhile, while the compute is spinning up, navigate back to home and open up the notebooks tab and upload your files to a folder. (I picked 768 noting the resolution)
As soon as the instance is up and running we can now open it in VSCode
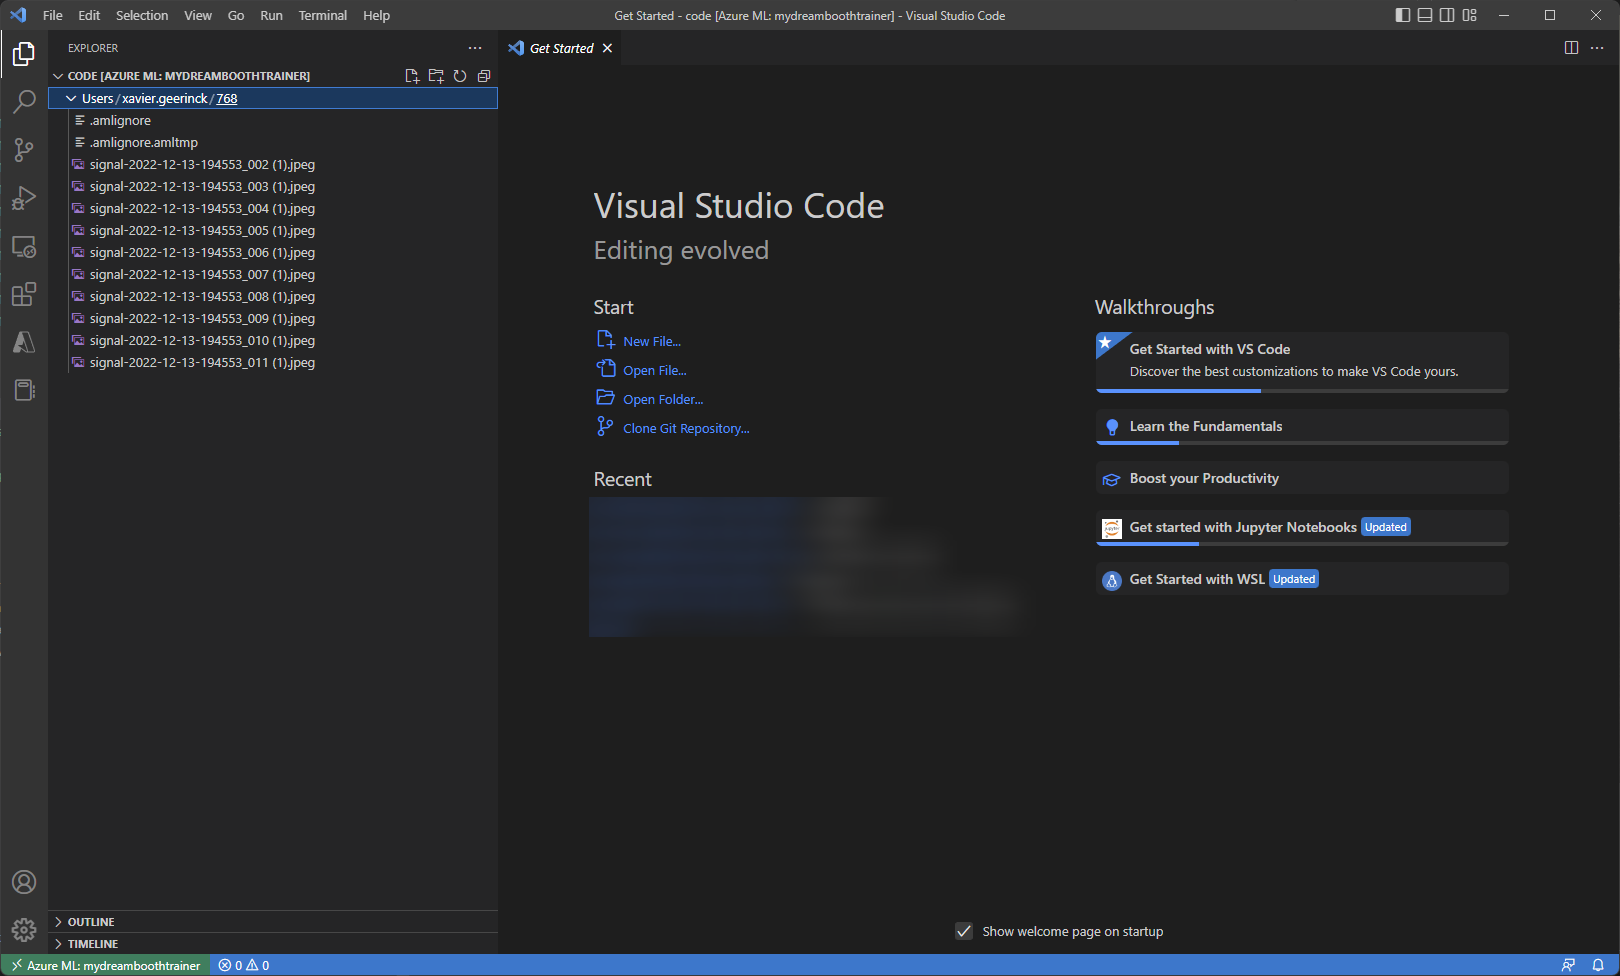
Where we run exactly the same setup process as before (see the script below and make it executable with chmod +x run.sh) as ./run.sh which will take the pictures from our uploaded files and set up the entire environment
#!/bin/bash
export MODEL_NAME="stabilityai/stable-diffusion-2"
export INSTANCE_DIR="/home/azureuser/cloudfiles/code/Users/xavier.geerinck/768"
export OUTPUT_DIR="/home/azureuser/cloudfiles/code/Users/xavier.geerinck/models/xavier-768"
# Download and install diffusers
git clone https://github.com/huggingface/diffusers
cd diffusers
pip install -e .
# Install the dreambooth example
cd examples/dreambooth
pip install -r requirements.txt
# Initialize Accelerate
# note: run `accelerate config` if you want to pick options
# note: run this manually and enable DeepSpeed!
accelerate config default
# Fix a wrong upstream package
pip install markupsafe==2.0.1
# TRAIN
# instance_prompt: description of what the object or style is with the initializer word sksperson
# we are tuning to batch size 2, learning rate 1e-6 and 1200 steps as recommended by hugging faces to train on faces
# we are using
accelerate launch train_dreambooth.py \
--pretrained_model_name_or_path=$MODEL_NAME \
--instance_data_dir=$INSTANCE_DIR \
--output_dir=$OUTPUT_DIR \
--instance_prompt="a photo of myselfiepicture" \
--resolution=768 \
--train_batch_size=1 \
--gradient_accumulation_steps=1 \
--learning_rate=1e-6 \
--lr_scheduler="constant" \
--lr_warmup_steps=0 \
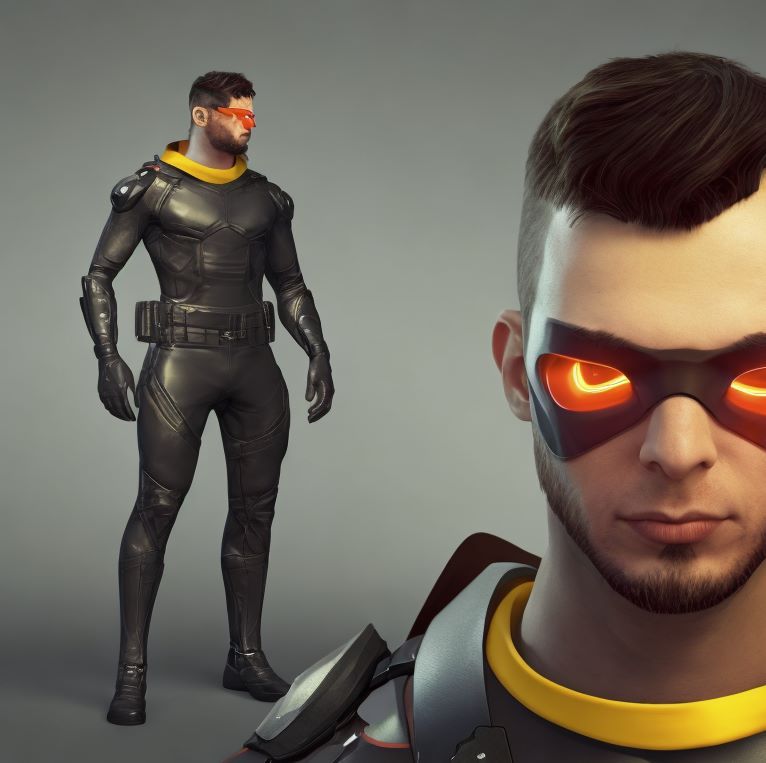
--max_train_steps=1200Generating an Avatar (Inferencing)
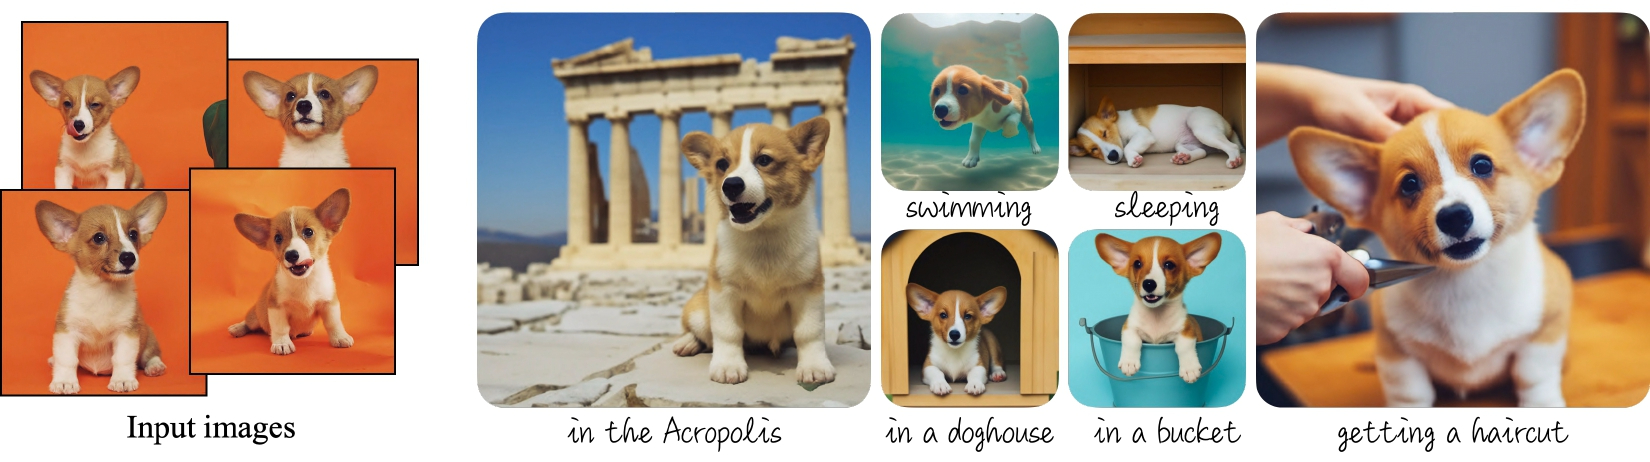
Once we are finally done with training our model we can start generating an avatar with it! navigate back to the main folder (where your dataset is located) and create a file named infer.py with the following content:
from diffusers import StableDiffusionPipeline
import torch

model_id = "./model/xavier"

pipe = StableDiffusionPipeline.from_pretrained(model_id, torch_dtype=torch.float16).to("cuda")

prompt = "a photo of myselfiepicture as a boxer, wearing a red robe"

image = pipe(prompt, num_inference_steps=50, guidance_scale=7.5).images[0]

image.save("result.png")
Now run the file with python infer.py and view the result.png file created! This should now be fitted with your subject and produce some of the results below
Coming soon - Distilled Diffusion
You might be wondering what is next? Well scientists are looking to optimize the given models to provide better performance and better quality. One such a promising model is "Distilled Diffusion" that is promising a 10x improvement on inferencing.
Summary
Hopefully after reading this article, you were able to train your own avatars! What did you think of it? Let me know in the comments below!
Comments ()